Azure Cloud Storage Connector
Azure Cloud Storage is a scalable, secure service for storing large amounts of unstructured data, including text, images, and video. It supports various storage types like blobs, files, queues, and tables, making it versatile for different storage needs.
Getting started with Azure Cloud Storage
-
Search for
Storage accountin the global search and click on the search result.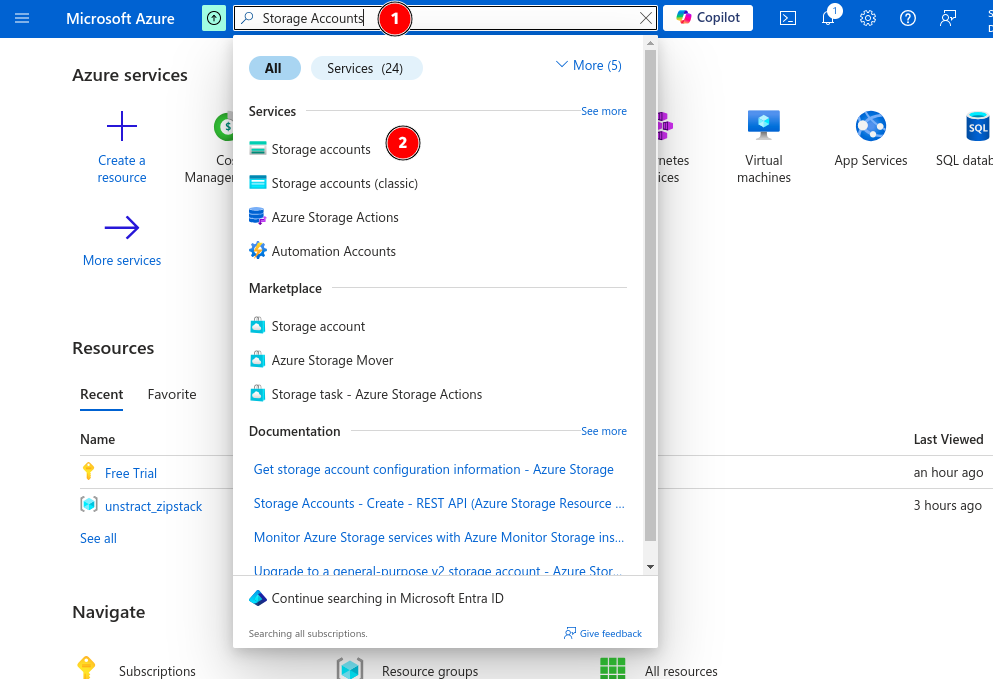
-
Click on
Create Storage Account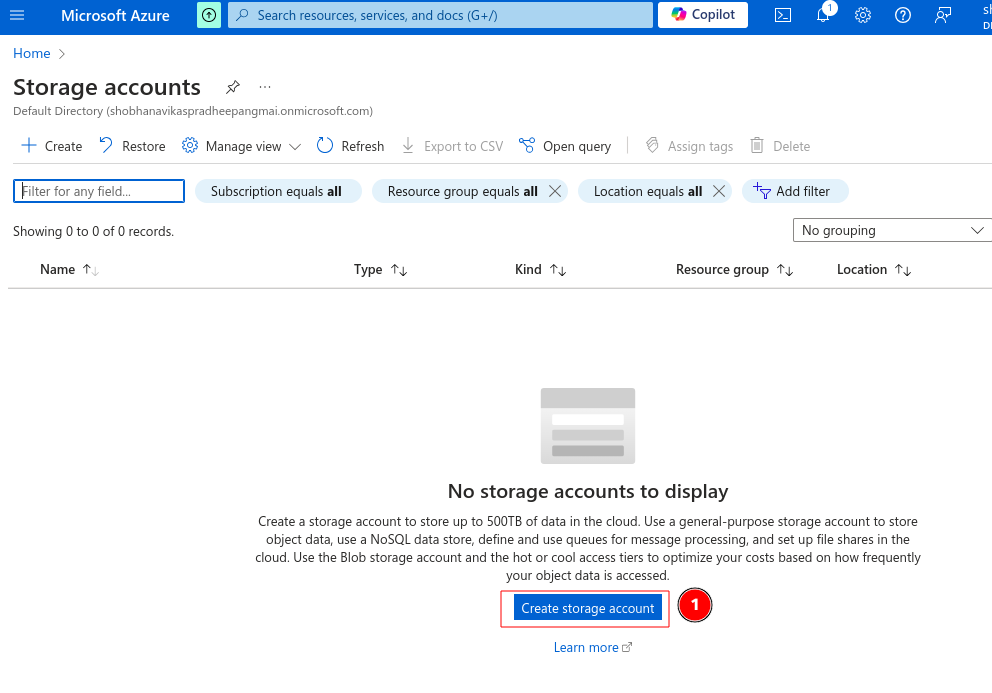
-
Enter the
Resource Group Nameand theStorage Name. If you want more customization, then visit the remaining tabs, or else just clickReview + Create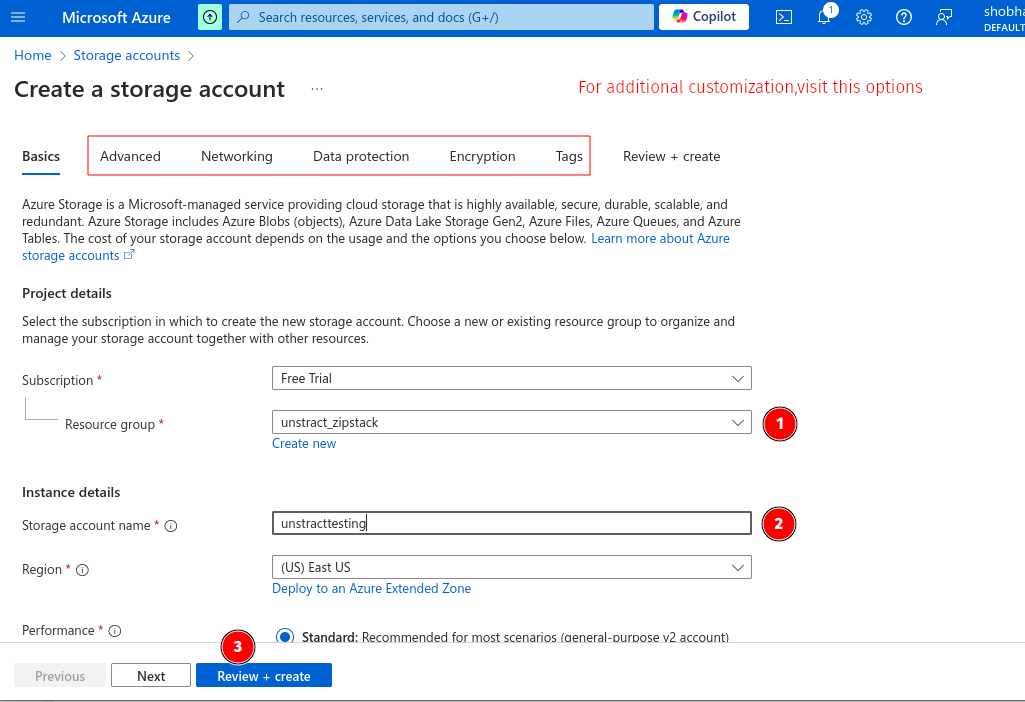
-
Verify the selected options and click on
Create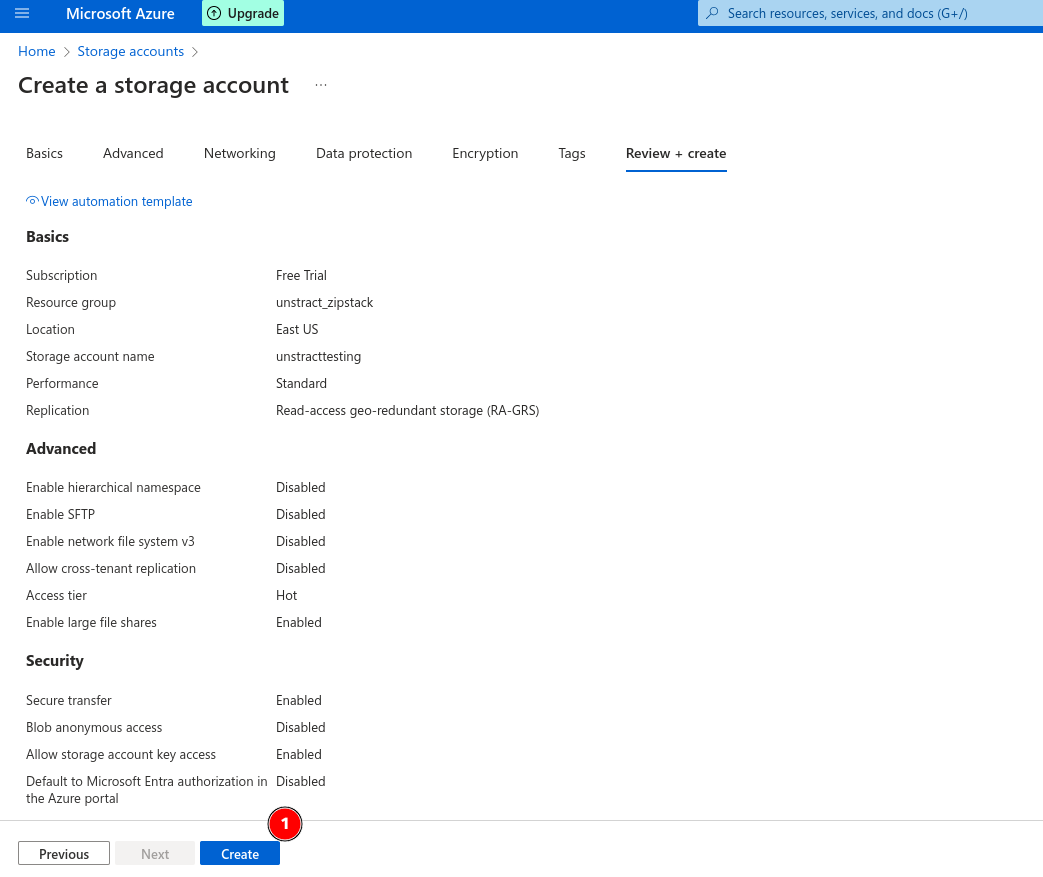
-
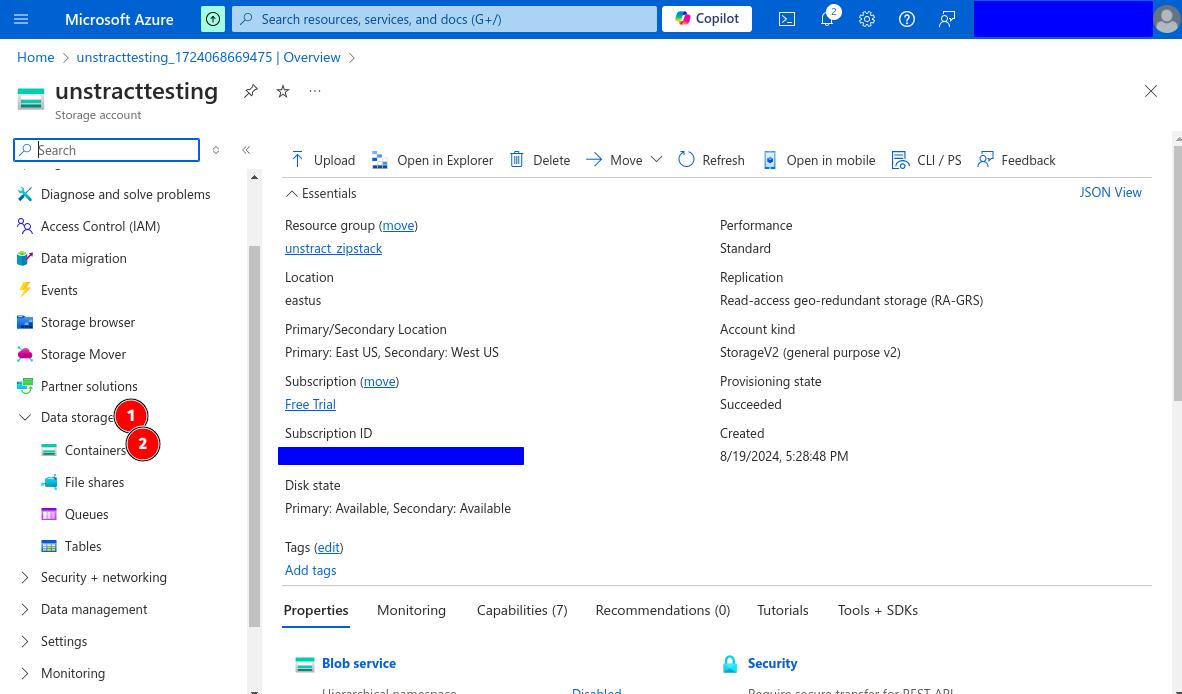
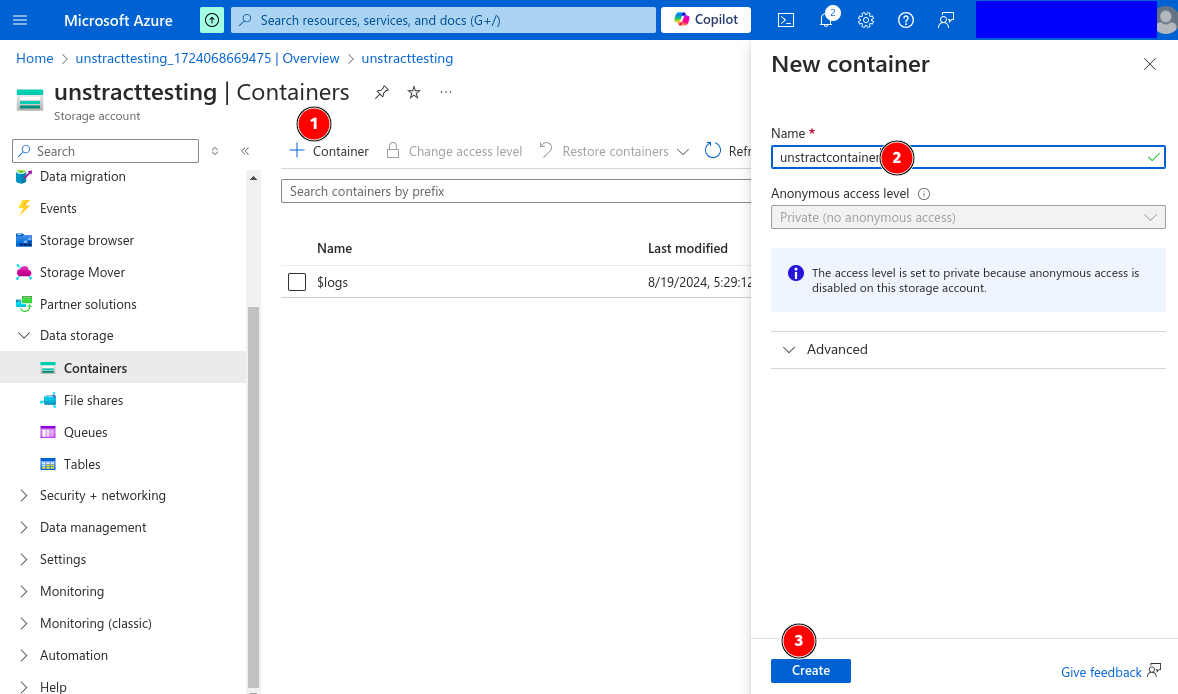
Now create the container in the storage account by doing the following, Click Data Storage-->Containers-->+Container-->Enter Name-->Save it.
-
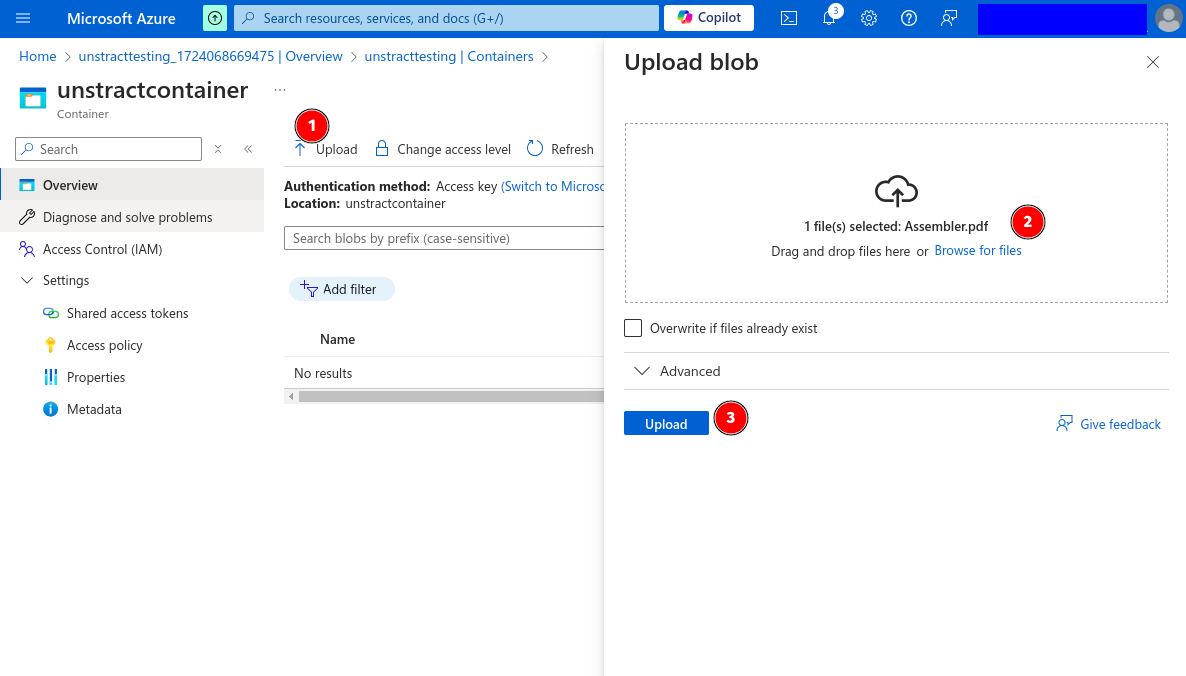
Upload the required files in the container.
-
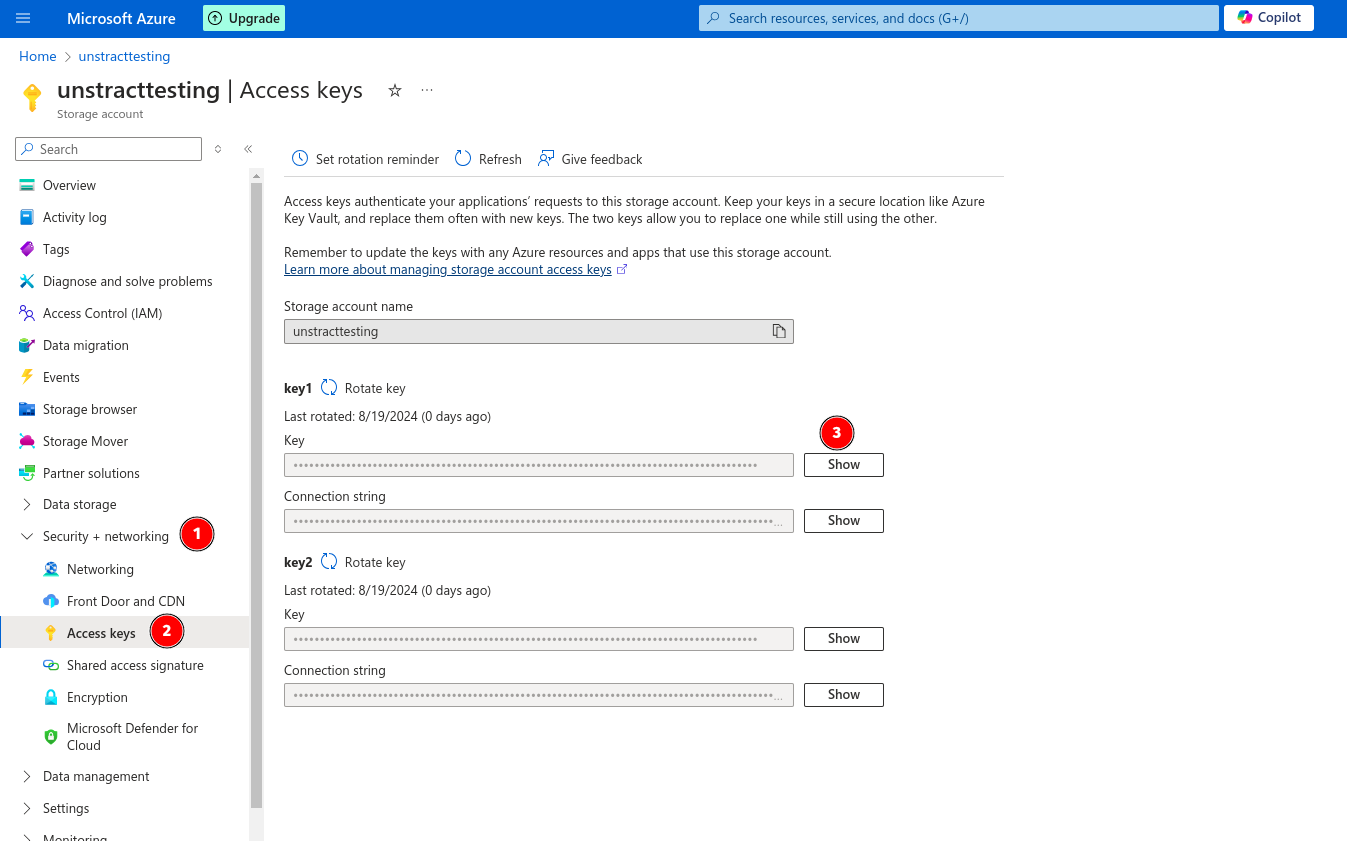
To get the Access key,navigate to Security+Networking-->Access Keys and click on show and copy the key.
Adding Azure Cloud Storage Connector in Unstract
For the common steps on adding connectors in Unstract, see Working with Connectors.
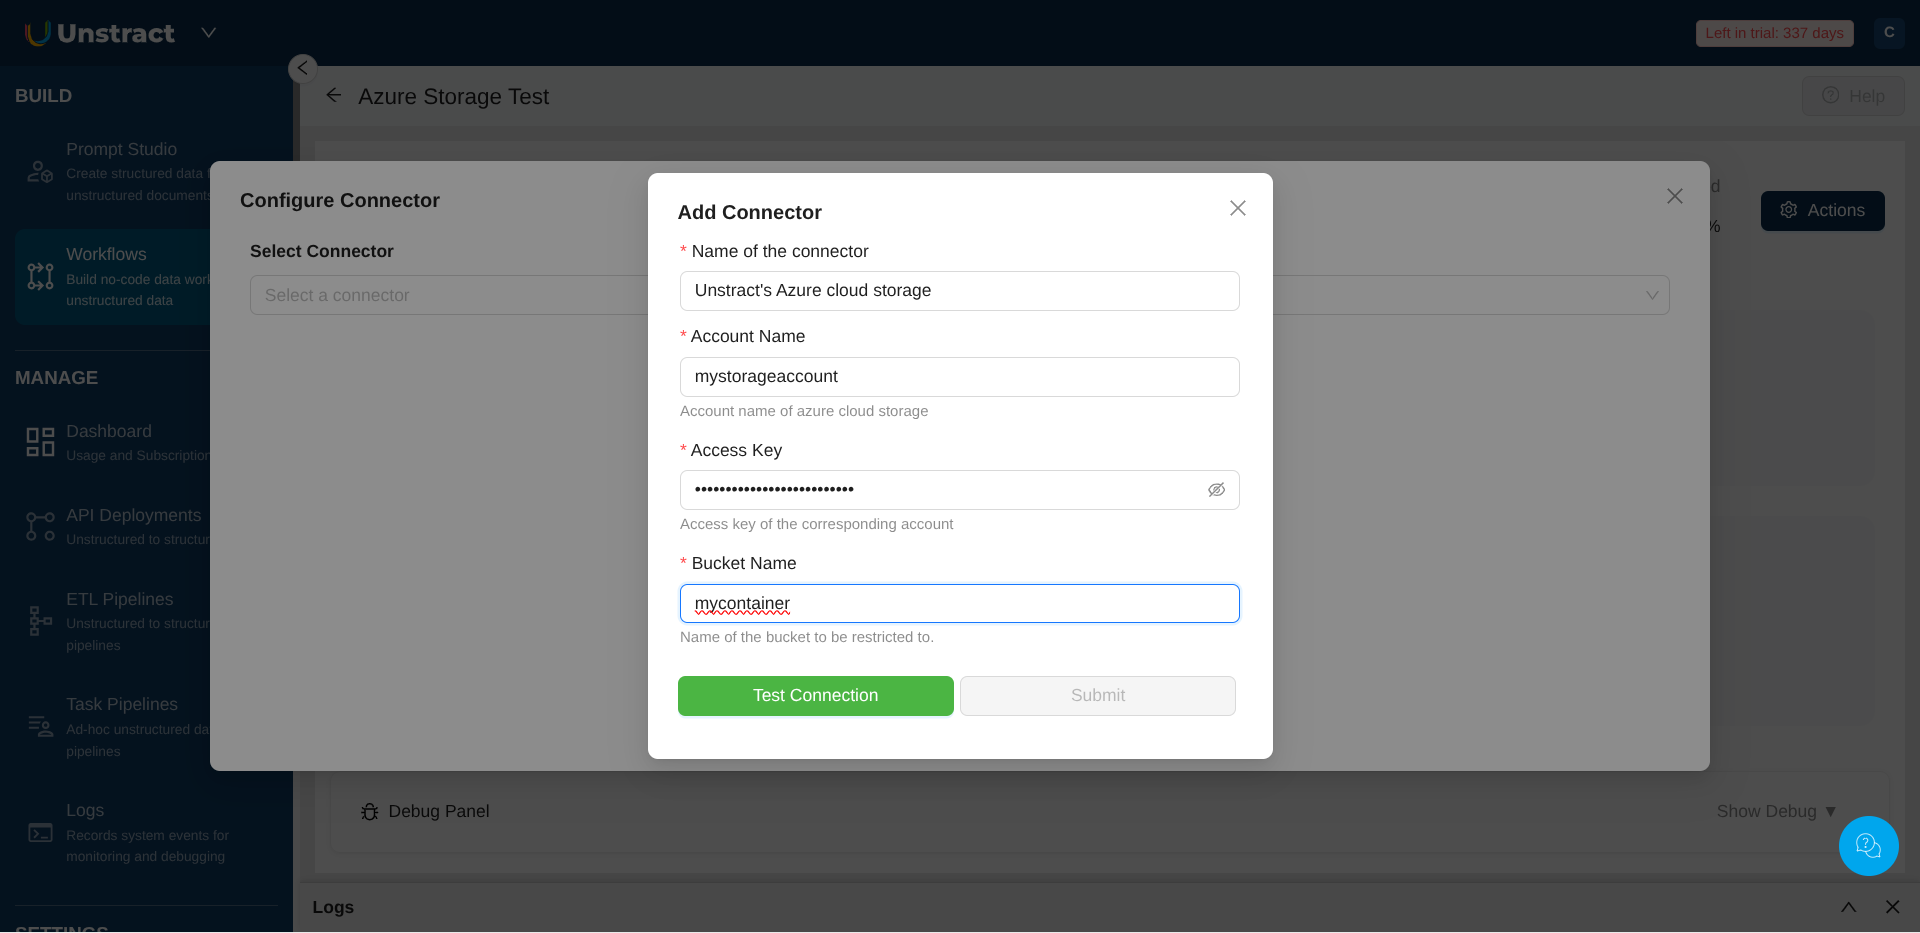
When configuring the Azure Cloud Storage connector, you'll need to provide the following connection details:
Required Configuration Fields
- Name of the connector: Enter a descriptive name (e.g., "Unstract's Azure cloud storage")
- Account Name: Enter the
Storage Nameyou created in step 4 of the Azure setup above - Access Key: Paste the access key you copied in step 8 of the Azure setup above
- Bucket Name: Enter the container name you created in step 6 of the Azure setup above
Need a hand?
Talk to us on Slack! We're here to help :)