ETL Pipeline Deployment Workflows
-
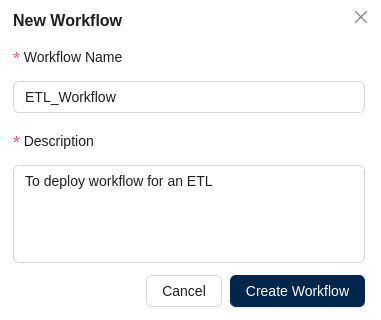
Now that you've exported a Prompt studio project, let's create a Workflow that we'll launch as an ETL pipeline. Navigate to Workflows in the side navigation menu and create a new workflow.
-
Let's configure the workflow using the new streamlined workflow setup interface:
The workflow setup is now organized into 4 main configuration steps:

-
Configure Source Connector:
- Select and configure your data input connector
- Choose
File Systemfrom the dropdown - Click the
Configurebutton to configure the input file system - You'll see your configured connector (e.g., "gallagher") displayed below
-
Configure Destination Connector:
- Select and configure your data output connector
- Choose
Databasefrom the dropdown - Click the
Configurebutton to configure the database system - You'll see your configured connector (e.g., "gallagher_dev") displayed below
-
Select Exported Prompt Studio project:
- Choose an exported Prompt Studio project for processing your data
- Your exported project will be displayed (e.g., "gallagher_staging_aug27")
- Use
Change Prompt Studio projectlink to select a different project - Click
Configure Settingsto modify the tool settings
-
Deploy Workflow:
- Deploy your workflow for processing
- Use
Deploy as ETLbutton to deploy workflows as unstructured data ETL Pipelines - Alternatively, use
Deploy Workflowfor other deployment options
-
-
Workflow Setup Progress: The interface shows a progress indicator at the top (4 of 4 steps completed) to track your configuration progress.
-
Deployment Confirmation: Once deployed, you'll see a confirmation message showing "This Workflow has been deployed as a ETL:" followed by your pipeline identifier.
-
Debug Panel: Use the Debug Panel at the bottom of the interface to monitor and troubleshoot your workflow execution.