Human in the Loop Workflow
This page explains how to create the Human in the Loop workflow.
-
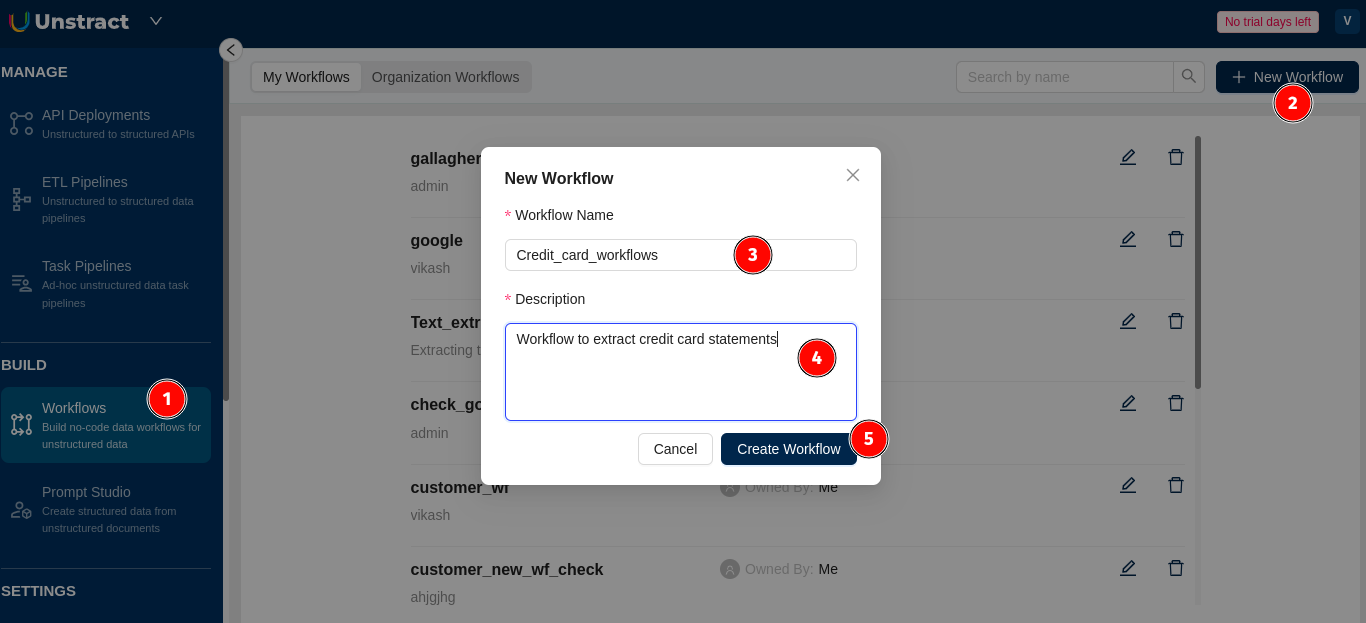
Now that you've exported a Prompt studio project, let's create a Workflow with Human in the Loop functionality. Navigate to Workflows in the side navigation menu and create a new workflow.
-
Let's configure the workflow using the streamlined workflow setup interface:
The workflow setup is organized into 4 main configuration steps:

-
Configure Source Connector:
- Select and configure your data input connector
- Choose
File Systemfrom the dropdown - Click the
Configurebutton to configure the input file system - You'll see your configured connector displayed below
-
Configure Destination Connector:
- Select and configure your data output connector
- Choose
Databasefrom the dropdown - Click the
Configurebutton to configure the database system - You'll see your configured connector displayed below
-
Select Exported Prompt Studio project:
- Choose an exported Prompt Studio project for processing your data
- Your exported project will be displayed
- Use
Change Prompt Studio projectlink to select a different project - Click
Configure Settingsto modify the tool settings
-
Deploy Workflow:
- Deploy your workflow for processing
- Use
Deploy as ETLbutton to deploy workflows as unstructured data ETL Pipelines with Human in the Loop functionality
-
-
In the same Destination DB settings (option 2 shown in above screenshot) click on
Configure, Click on theHuman in the Looptab next to the settings tab.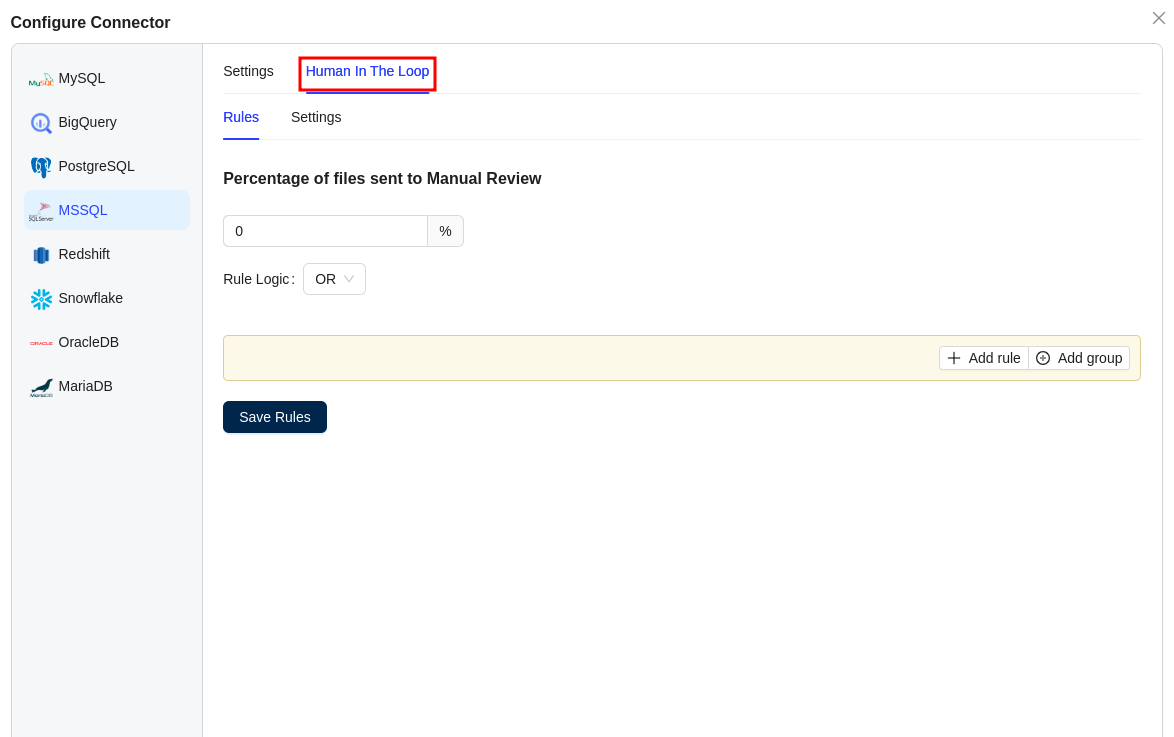
-
In the
Rulestab, the rules logic can be added- Percentage of files sent to Manual Review : The user can set the percentage of files to be sent to HITL (Human-in-the-Loop). Based on this percentage, files will be sent to HITL accordingly. For example, if the percentage is set to 50 and 2 files are processed, then 1 file will be sent to HITL, while the other will be sent directly to the Destination DB.
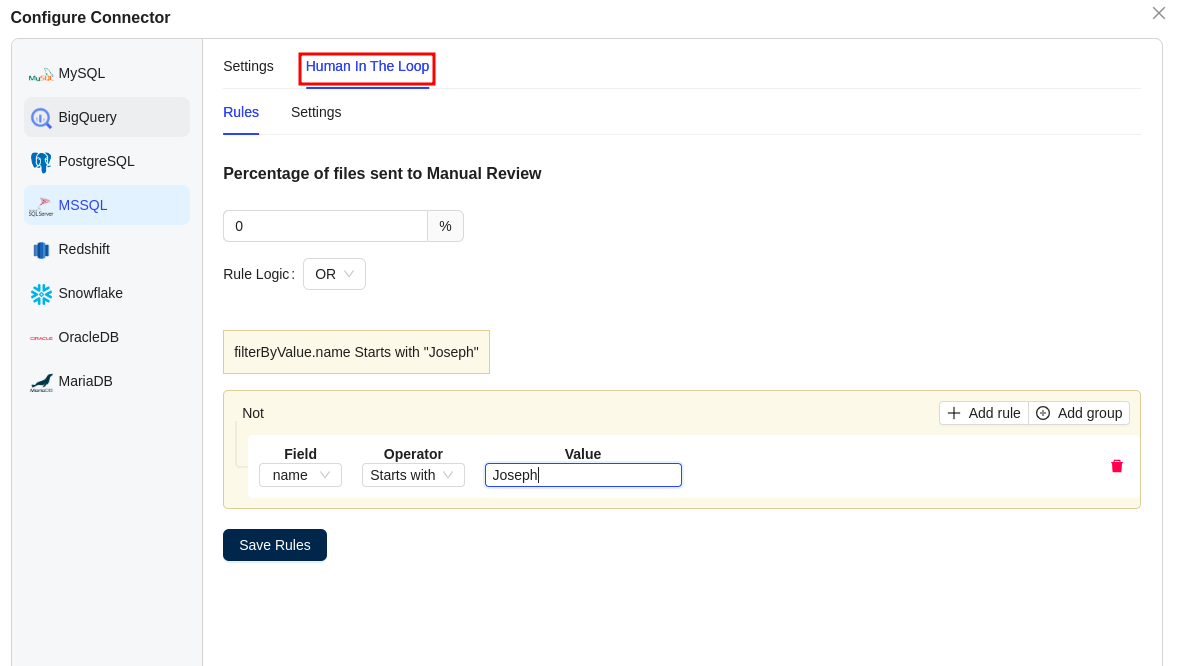
- Rule Logic - The user can set the logic to either
ANDorOR - Add Rule - Here, the user can set rules based on specific conditions. All prompt keys (used in Prompt Studio) will be listed, allowing the user to validate conditions. For example, if the key is 'Name,' the user can set a rule such as 'Name starts with Joseph.' Only files that satisfy the condition will be sent to HITL.
-
Click on the
settingsin the HITL tab and set the field value for 'After approval, send result to.' The available options are 'Destination DB' and 'Queue.' Based on the selected option, the file will be sent to the database or the queue after approval.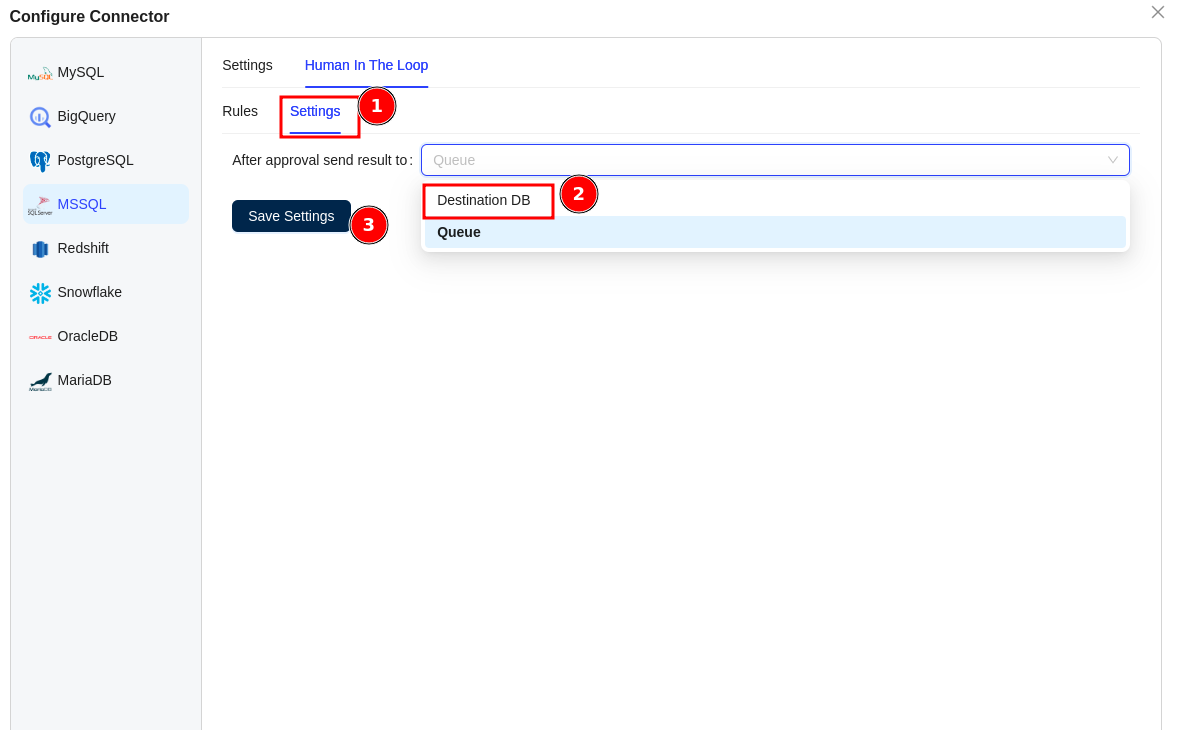
-
Once all the setting are done, Click on save settings this will be reflected in the deployed workflow.