Creating API Deployments from Prompt Studio
The API deployment feature allows you to deploy your Prompt Studio project directly as an API without needing to create a separate workflow. This streamlined approach gets your document processing API up and running quickly.
Getting Started
Before creating an API deployment, ensure you have:
- A completed Prompt Studio project that extracts the intended information well
- Tested your project with sample documents
- Verified the output quality meets your requirements
Step-by-Step Process
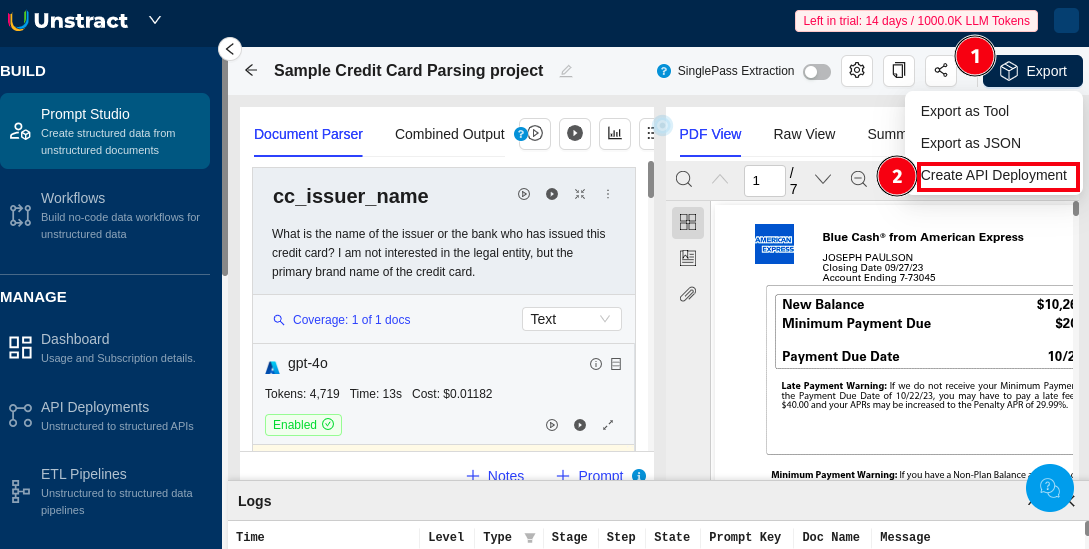
Step 1: Access the Export Options
- Open your Prompt Studio project - Navigate to the project you want to deploy as an API
- Click the Export button - Located in the top toolbar of your Prompt Studio interface
- Select "Create API Deployment" - From the three available export options:
- Export as Tool
- Export as JSON
- Create API Deployment ← Select this option
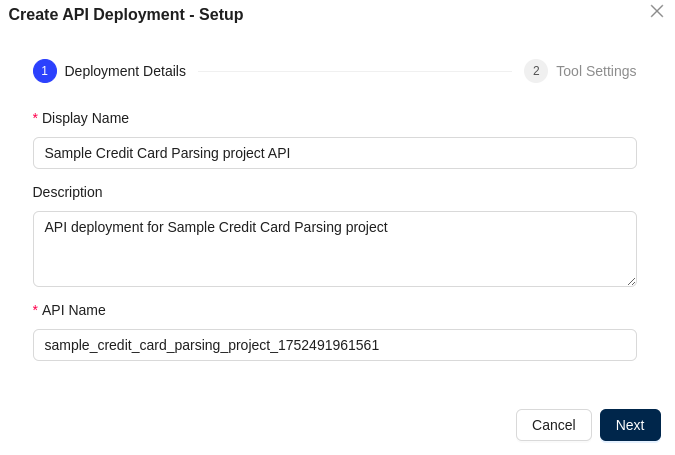
Step 2: Deployment Details Setup
Configure the basic details for your API deployment:
-
Display Name: Enter a descriptive name for your API deployment
- Example:
Credit Card Parser API
- Example:
-
Description: Add a detailed description of what this API deployment does
- Example:
API deployment for Credit Card Parser
- Example:
-
API Name: Specify the unique API name (this will be part of your API endpoint)
- Example:
credit_card_parser_1752483494579 - Note: This name must be unique across your deployment
- Example:
-
Click Next to proceed to tool settings
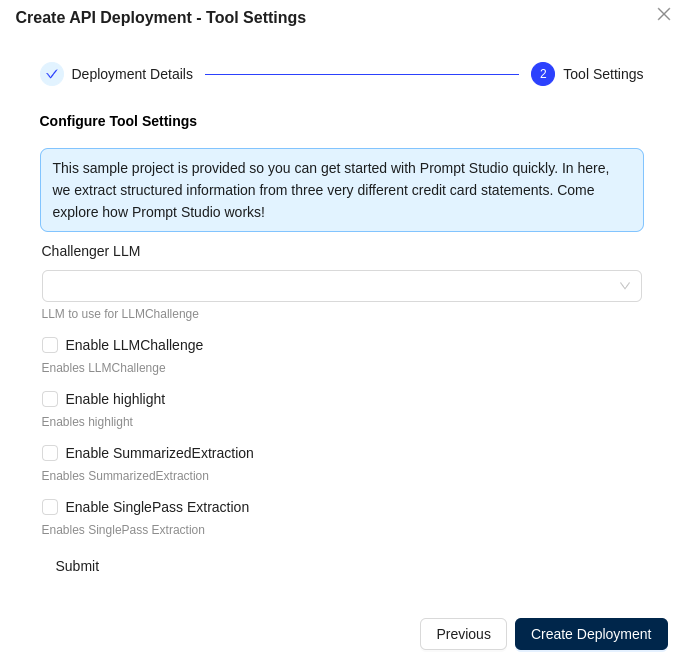
Step 3: Tool Settings Configuration
Configure the tool settings for your API deployment:
-
Configure Tool Settings: Enter the tool configuration name
- Example:
credit_card_parser
- Example:
-
Challenger LLM: Select the LLM to use for LLMChallenge from the dropdown menu
- Description: LLM to use for LLMChallenge
-
Enable Options: Check the boxes for features you want to enable:
- Enable LLMChallenge: Enables LLMChallenge functionality
- Enable highlight: Enables highlight feature
- Enable SummarizedExtraction: Enables SummarizedExtraction
- Enable SinglePass Extraction: Enables SinglePass Extraction
-
Click Create Deployment to finalize the API deployment
Navigation Options
- Previous: Go back to the Deployment Details step
- Cancel: Cancel the API deployment process
- Create Deployment: Complete the API deployment
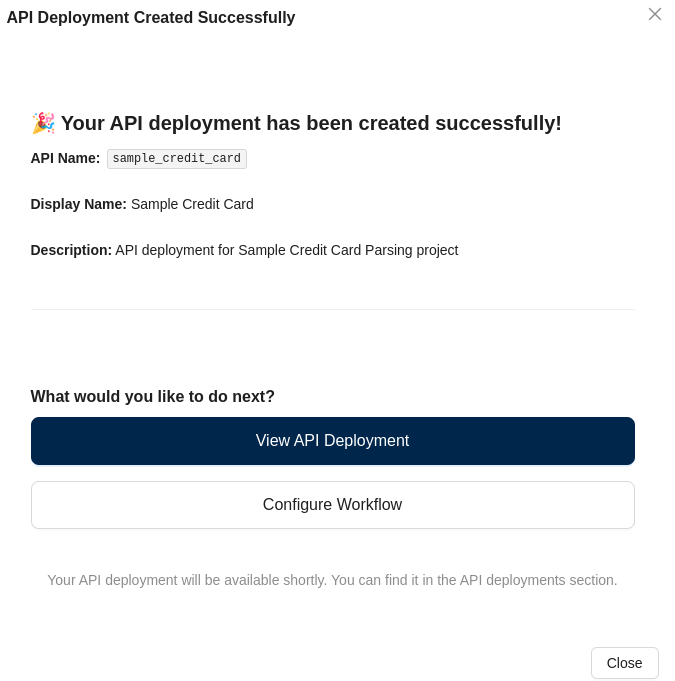
Step 4: API Deployment Success
After clicking Create Deployment, you'll see a success confirmation screen with the following information:
Deployment Confirmation
🎉 Your API deployment has been created successfully!
The success screen displays:
- API Name: The unique identifier for your API (e.g.,
credit_card_parser_1752486232785) - Display Name: Your chosen display name (e.g.,
Credit Card Parser API) - Description: The description you provided (e.g.,
API deployment for Credit Card Parser)
Next Steps Options
What would you like to do next?
You have two options to proceed:
-
View API Deployment (Primary action)
- Takes you to the API deployment details page
- Shows deployment status, endpoint information, and usage details
-
Configure Workflow (Secondary action)
- Allows you to create additional workflows using this deployed API
- Useful for building more complex processing pipelines
Click Close to dismiss the success dialog and return to Prompt Studio, or choose one of the next step options to continue working with your newly deployed API.
Using Your Deployed API
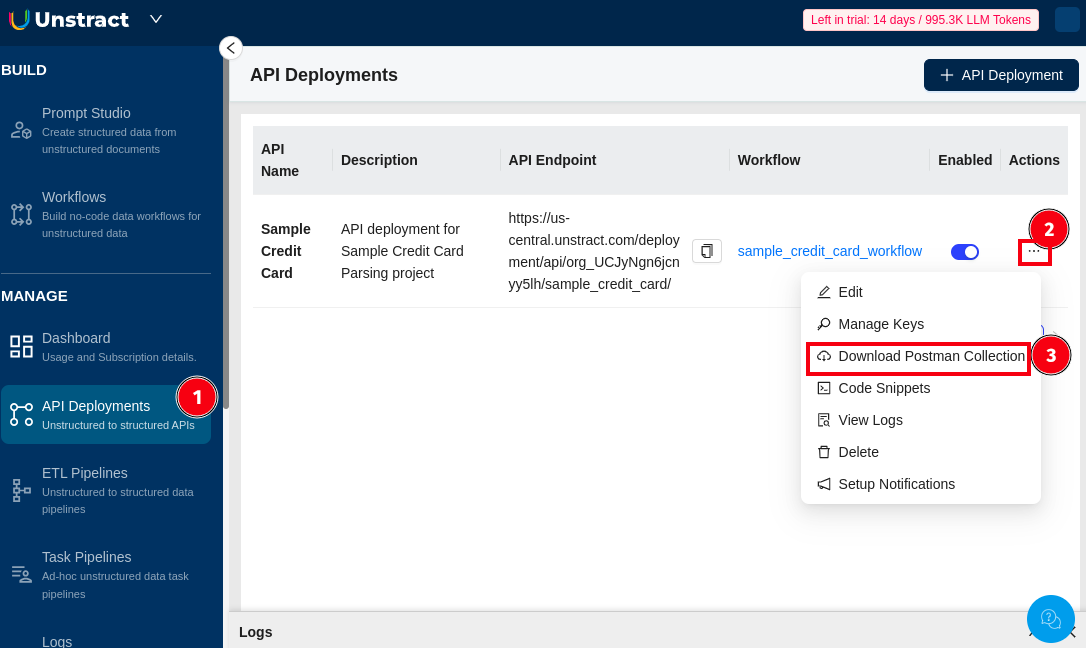
Once your API is deployed, you can access it from the API Deployments page:
- Navigate to API Deployments from the left sidebar
- Find your deployed API in the table showing API Name, Description, API Endpoint, Workflow, and status
- Click on the Actions button (⋮) for your API deployment
- Select Download Postman Collection to get a ready-to-use Postman collection for testing your API
The Postman collection will include all necessary API endpoints and configuration to start testing your document processing API immediately.