Set up the Prompt Studio project
Let's set up basic settings now so we can get started with our prompt engineering to structure credit card statements.
Creating an LLM Profile
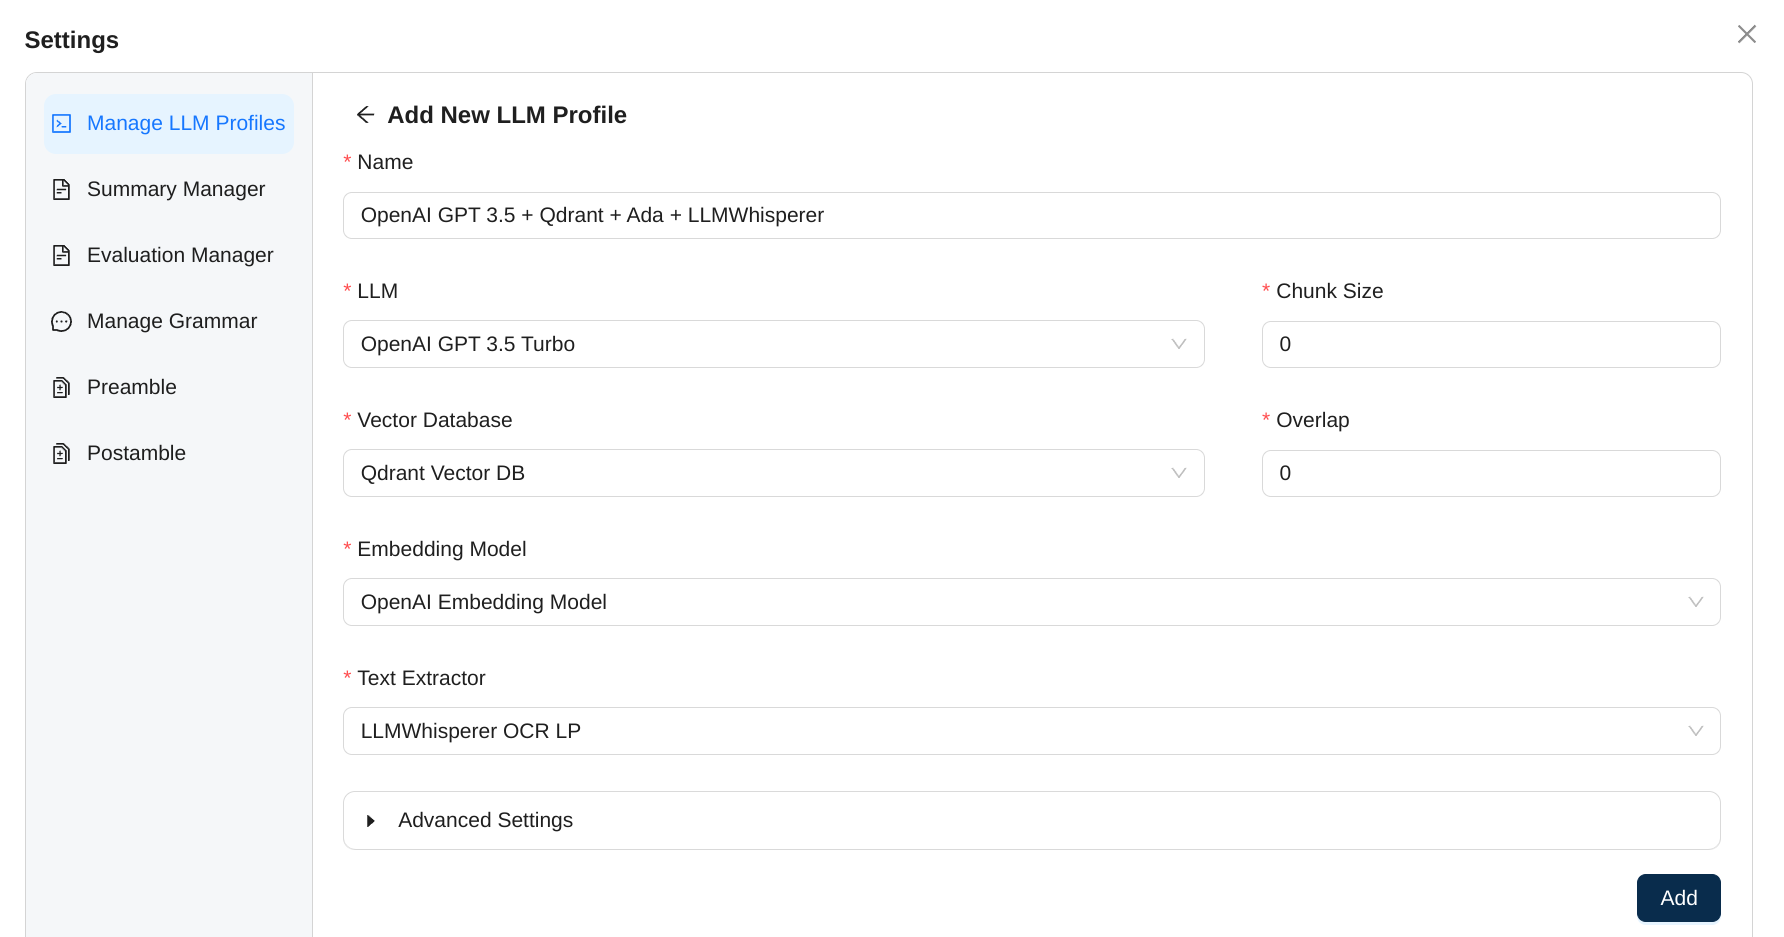
First off, let's create an LLM Profile. LLM Profiles allow you to easily manage various settings related to how a document is indexed and structured from a single place. LLM Profiles typically contain a Triad, which is a combination of an LLM, a Vector Database and an embedding model apart from a Text Extractor. You can create multiple LLM Profiles per project and switch between them on a per prompt basis. This let you test how your prompts are performing for various LLMs you've configured in your platform.
- In Prompt Studio, click on Settings 🞂
Manage LLM Profiles🞂Add New LLM Profile.

- For
Name, enterOpenAI GPT 3.5 + Qdrant + Ada + LLMWhisperer, which provides a descriptive name for our LLM profile. - Set
LLMto the OpenAI LLM we added earlier. - Set
Vector Databaseto the Qdrant vector database we created earlier. - Set
Chunk SizeandOverlapto0. We will discuss later on why these values make sense for credit card statements. - Set
Embedding Modelto the OpenAI embedding model we created earlier. - Set
Text Extractorto the LLMWhisperer option we created earlier. - Click on the
Addbutton to create this new profile.
Since this is the first LLM Profile we're creating, it should automatically set itself as the default profile as well.
Create a Preamble
Preambles are prefixed to any prompt instruction that is sent to the LLM. They can be very useful to avoid any unnecessary repetition.

- Enter the following for the Preamble:
Your ability to extract and summarize this information accurately is essential for effective credit card statement analysis. Pay close attention to the credit card statement's language, structure, and any cross-references to ensure a comprehensive and precise extraction of information. Do not use prior knowledge or information from outside the context to answer the questions. Only use the information provided in the context to answer the questions. - Click on
Save
Create a Postamble
Postambles are like preables and serve much of the same purpose except that they are suffixed to each prompt you enter.

- Enter the following for the Postamble:
Do not include any explanation in the reply. Only include the extracted information in the reply. - Click on
Save
These are all the settings we need for us to get started. Let's add our sample documents to the project next.