File History
File History keeps track of files that have been processed by your workflows. It helps prevent duplicate processing and lets you see the status of each file.
What File History Does
- Tracks processed files: Records every file that goes through your workflow
- Prevents duplicates: Successfully processed files are automatically skipped in future runs
- Shows errors: Displays which files failed and why
- Enables reprocessing: Delete records to process files again
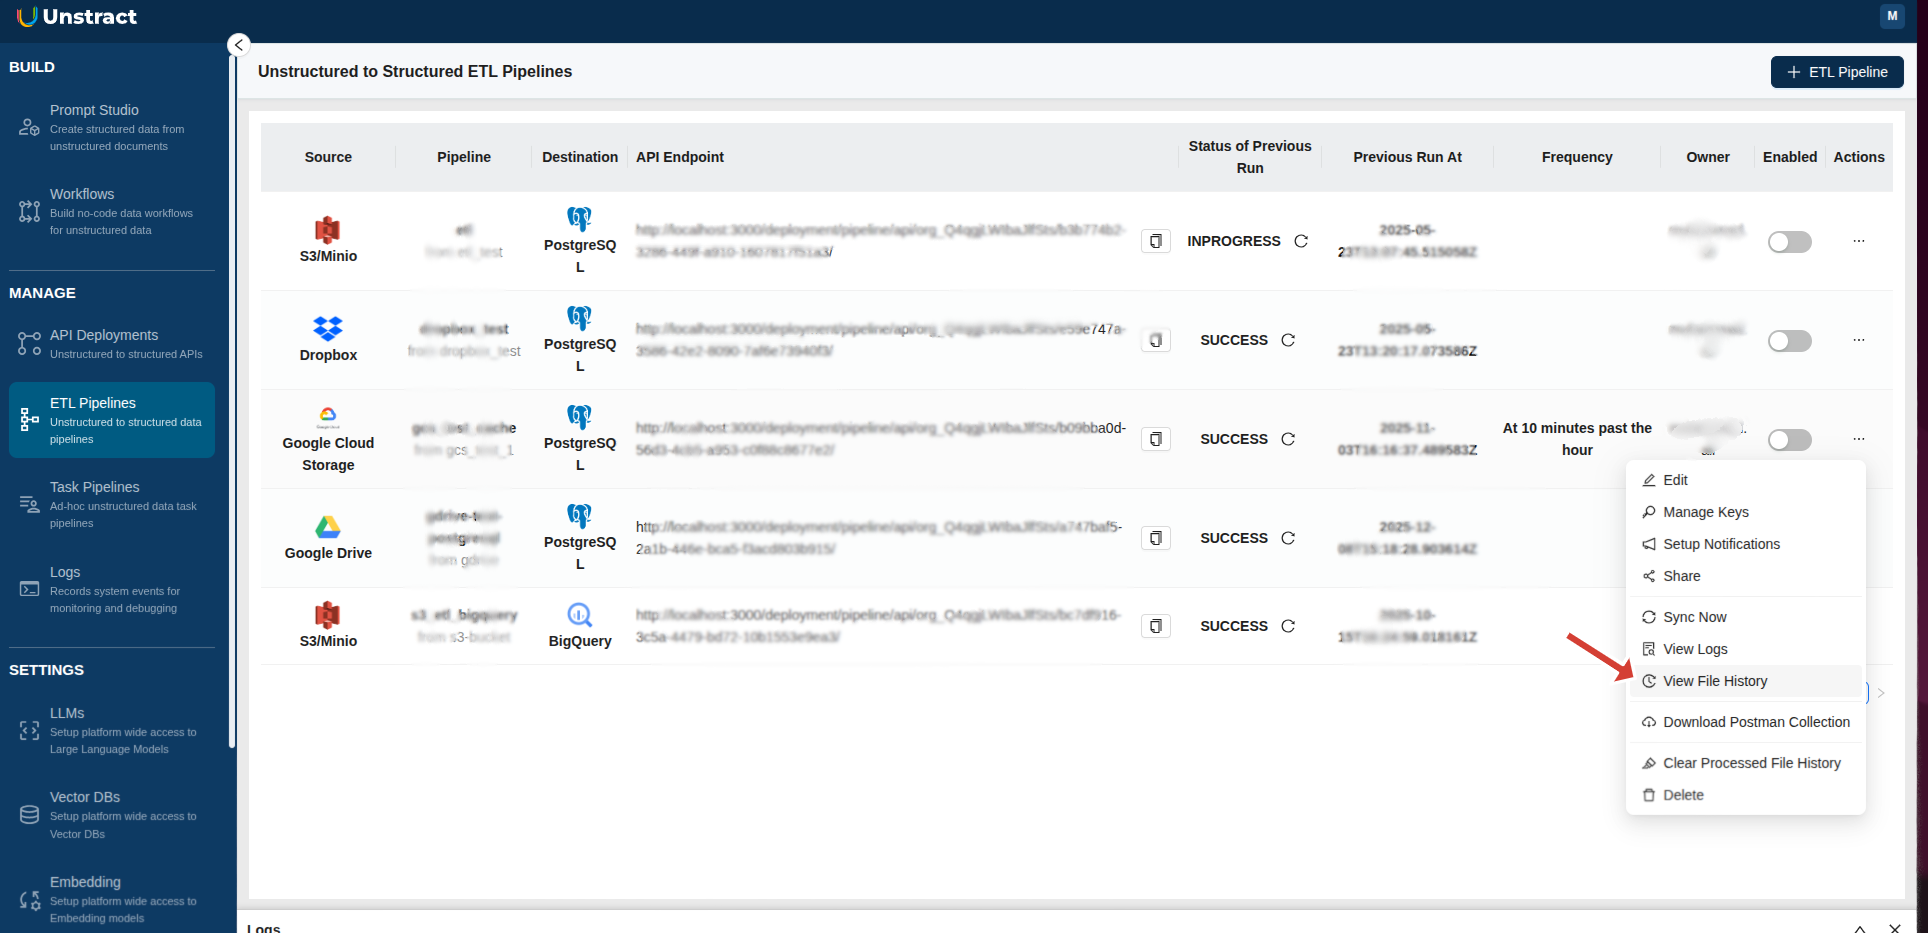
Accessing File History
From ETL Pipeline, Task Pipeline, or Workflow
- Navigate to ETL Pipelines, Task Pipelines, or Workflows page
- Find your pipeline or workflow in the list
- Click the Actions menu (three dots)
- Select View File History
Understanding the File History Table
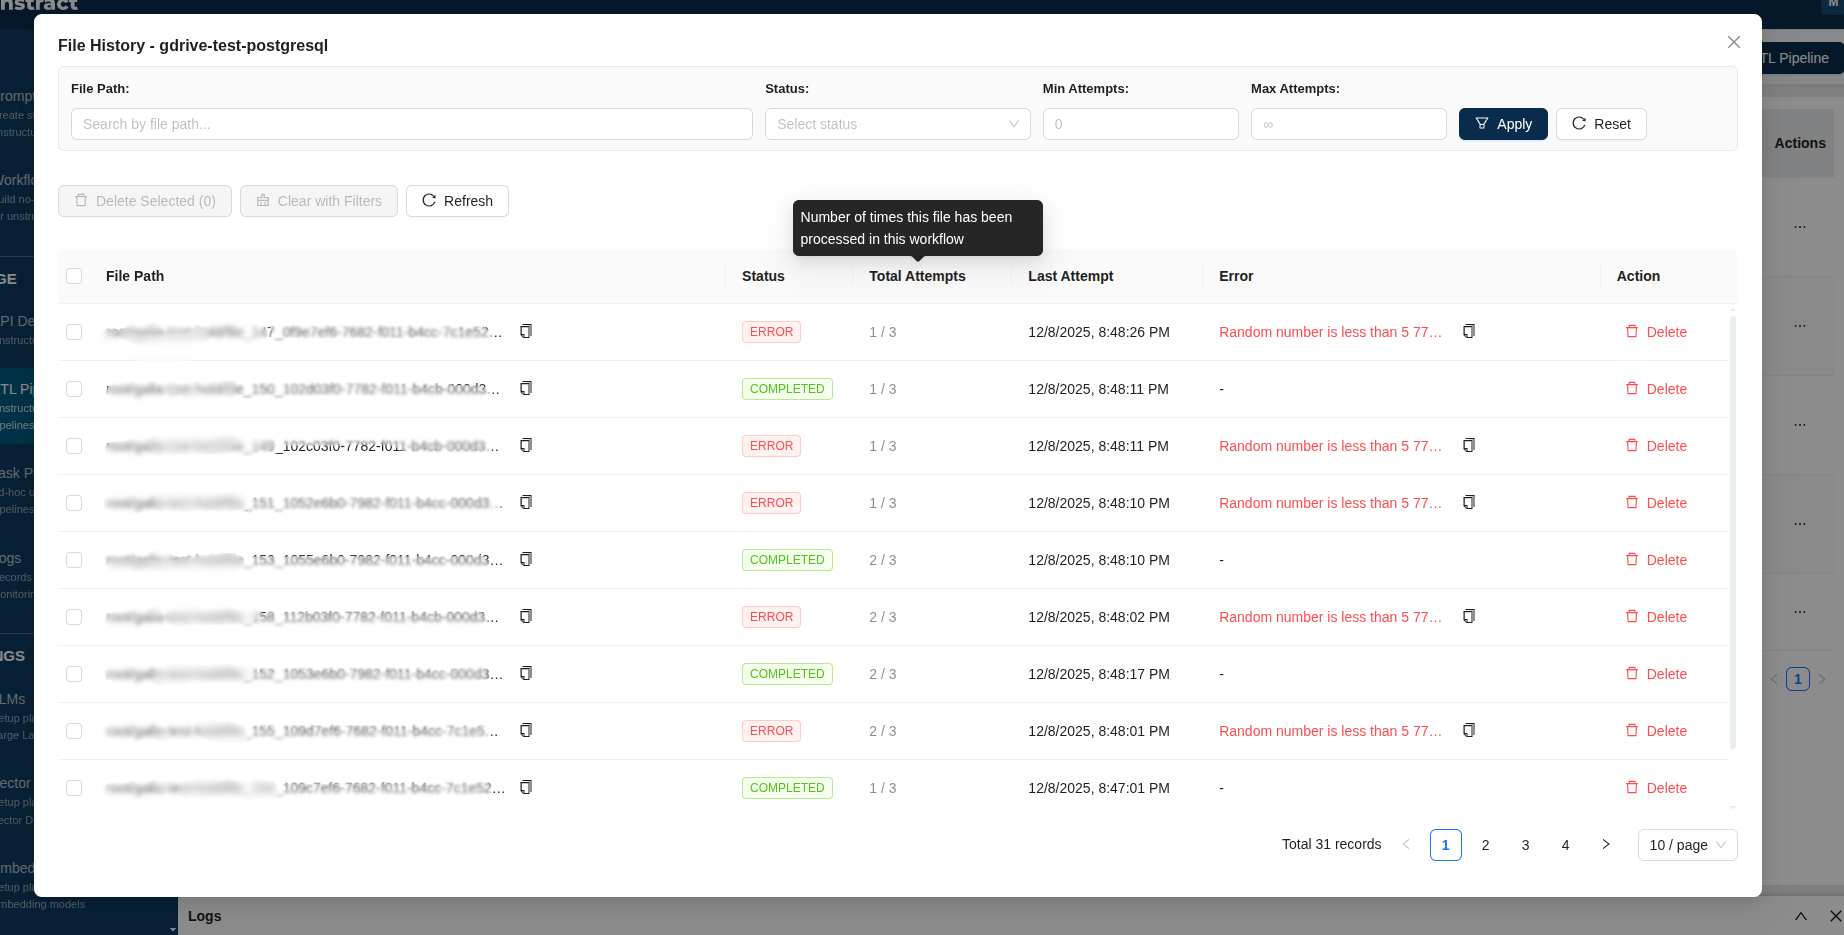
Table Columns
| Column | Description |
|---|---|
| File Path | The location of the processed file |
| Status | Whether processing succeeded or failed |
| Total Attempts | Number of times the file was processed (e.g., "1 / 3" means 1 attempt out of 3 maximum) |
| Last Attempt | When the file was last processed |
| Error | Error message if processing failed |
| Action | Delete button to remove the record |
Status Values
| Status | Color | Meaning |
|---|---|---|
| Completed | Green | File processed successfully. Won't be processed again |
| Error | Red | Processing failed. Will retry automatically (up to 3 times) |
Filtering Files
Use the filters at the top of the File History table to find specific files:
| Filter | What It Does |
|---|---|
| File Path | Search by file name or path |
| Status | Show only Completed or Error files |
| Min Attempts | Show files processed at least N times |
| Max Attempts | Show files processed at most N times |
After setting filters, click Apply to update the results. Click Reset to clear all filters.
Clearing File History
Clear file history when you want to reprocess files that were already completed.
Clear All Files
Quick way to clear everything:
- Go to your pipeline's Actions menu
- Select Clear Processed File History
- All records for that pipeline are removed
Delete Individual Files
- Open View File History
- Find the file in the table
- Click the Delete button in the Action column
- Confirm the deletion
Delete Multiple Files
- Open View File History
- Check the boxes next to files you want to delete
- Click Delete Selected
- Confirm the deletion
Delete Files Matching Filters
- Apply filters to show only the files you want to delete
- Click Clear with Filters
- Review the count and confirm
Common Questions
Why isn't my file being processed?
If a file was already processed successfully, it won't run again. To reprocess it:
- Open View File History
- Find the file
- Delete its record
- Run your pipeline again
What happens when a file fails?
Files with errors will automatically retry on the next pipeline run, up to 3 times total. After 3 failed attempts, the file stops retrying.
How do I reprocess a file that failed 3 times?
- Check the Error column in File History to understand what went wrong
- Review the Execution Logs for more details (navigate to MANAGE → Logs in the left panel)
- Fix the issue with the file if possible
- Open View File History and delete the record
- Run your pipeline again
How do I reprocess all files?
Use Clear Processed File History from the Actions menu to remove all records, then run your pipeline.
Tips
- Check errors first: Look at the Error column to understand why files failed
- Use filters: When you have many files, filters help you find specific ones quickly
- Copy paths easily: Click the copy icon next to file paths to copy them
- Refresh for updates: Click the Refresh button to see the latest data