Auto Approval in HITL Validation
By default, the HITL (Human in the Loop) workflow includes two levels of validation:
- Review - First level validation
- Approval - Second level validation
Based on your requirements, you can configure the system to enable auto-approval and use only single-level validation (Review only).
Only users with Admin privileges can configure auto-approval settings. Regular users will not have access to these settings.
Overview
When auto-approval is enabled, documents reviewed and validated in the Review screen will automatically skip the Approval stage. The results will be sent directly to the queue or database based on your configured workflow settings.
Configuration Options
You can enable auto-approval in two ways:
- Based on Document Classes (Project-based)
- Based on Users (Reviewer-based)
How to Enable Auto-Approval
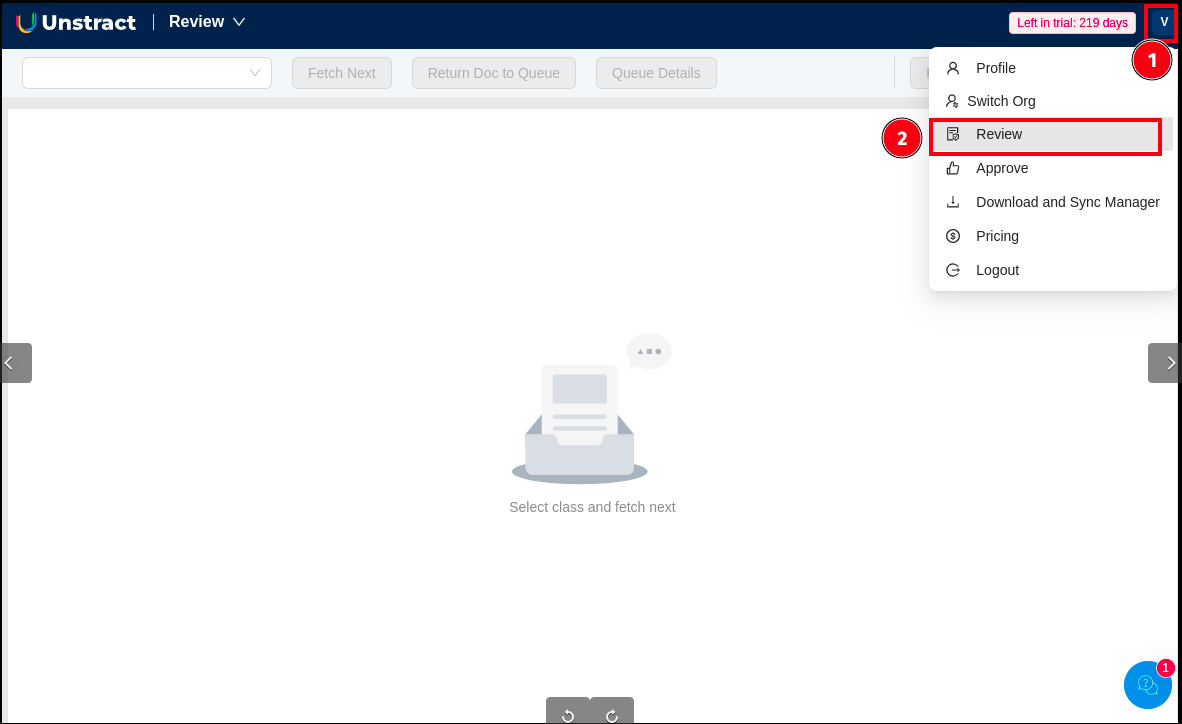
Step 1: Navigate to Review Screen
- Click on your profile menu in the top-right corner
- Select Review from the dropdown menu
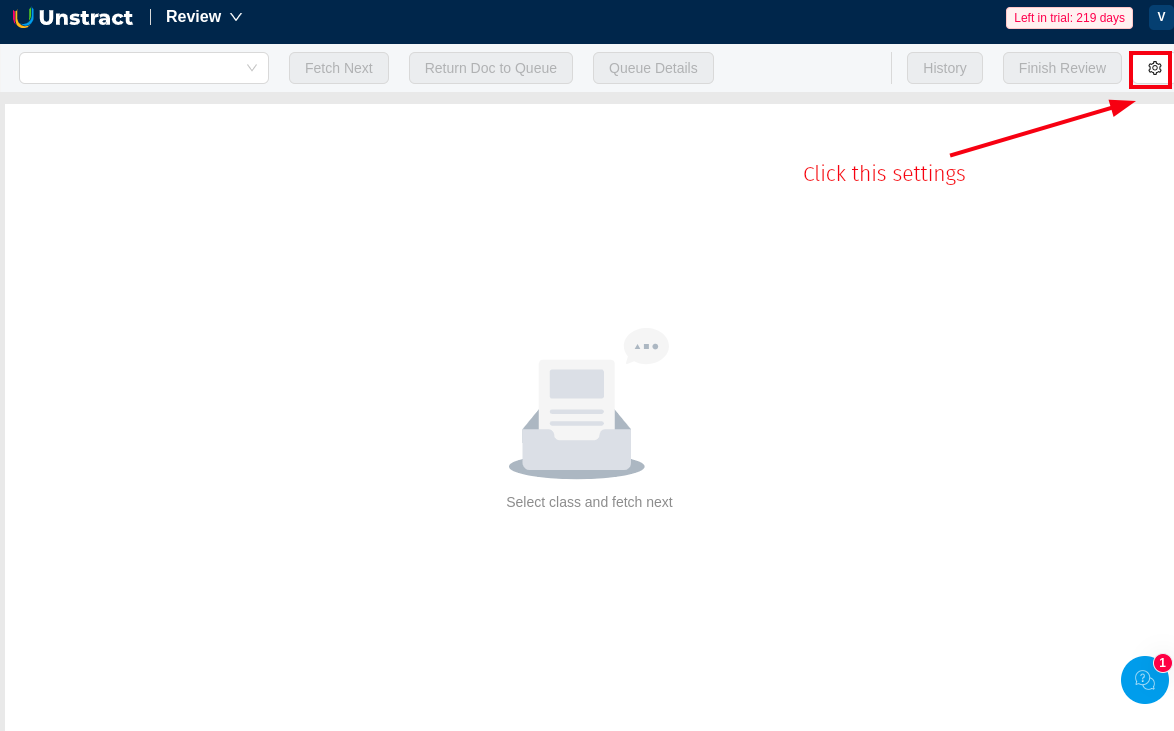
Step 2: Access Settings
- On the Review screen, click the Settings icon (⚙️) located in the top-right corner
Step 3: Configure Auto Approval Settings
The Manual Review Management page will open with two tabs:
- Auto Approval Settings (default selected)
- Packet Queue Management
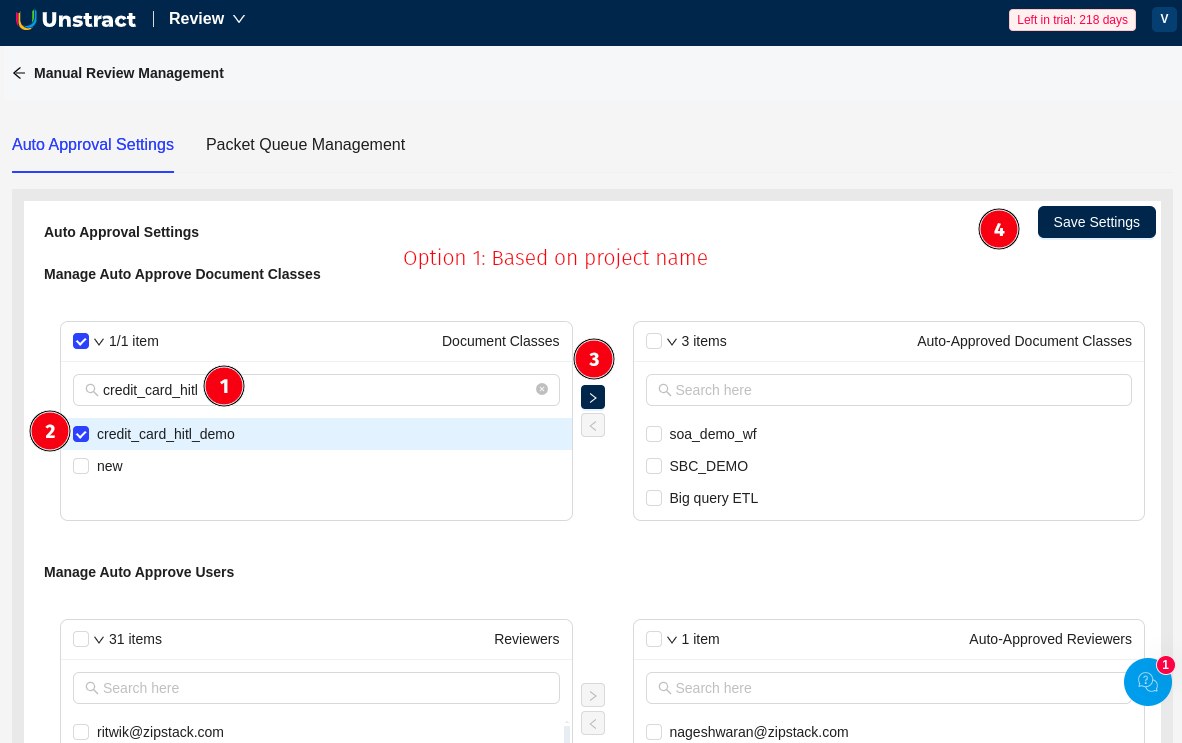
Option 1: Based on Document Classes (Project)
Configure auto-approval for specific document classes/projects:
-
In the Manage Auto Approve Document Classes section:
-
Search for the document class in the search box (left panel labeled "Document Classes")
-
Select the document class by checking the checkbox (e.g.,
credit_card_hitl_demo) -
Click the arrow button (>) to move it to the right panel labeled "Auto-Approved Document Classes"
-
The selected document class will now appear in the auto-approved list
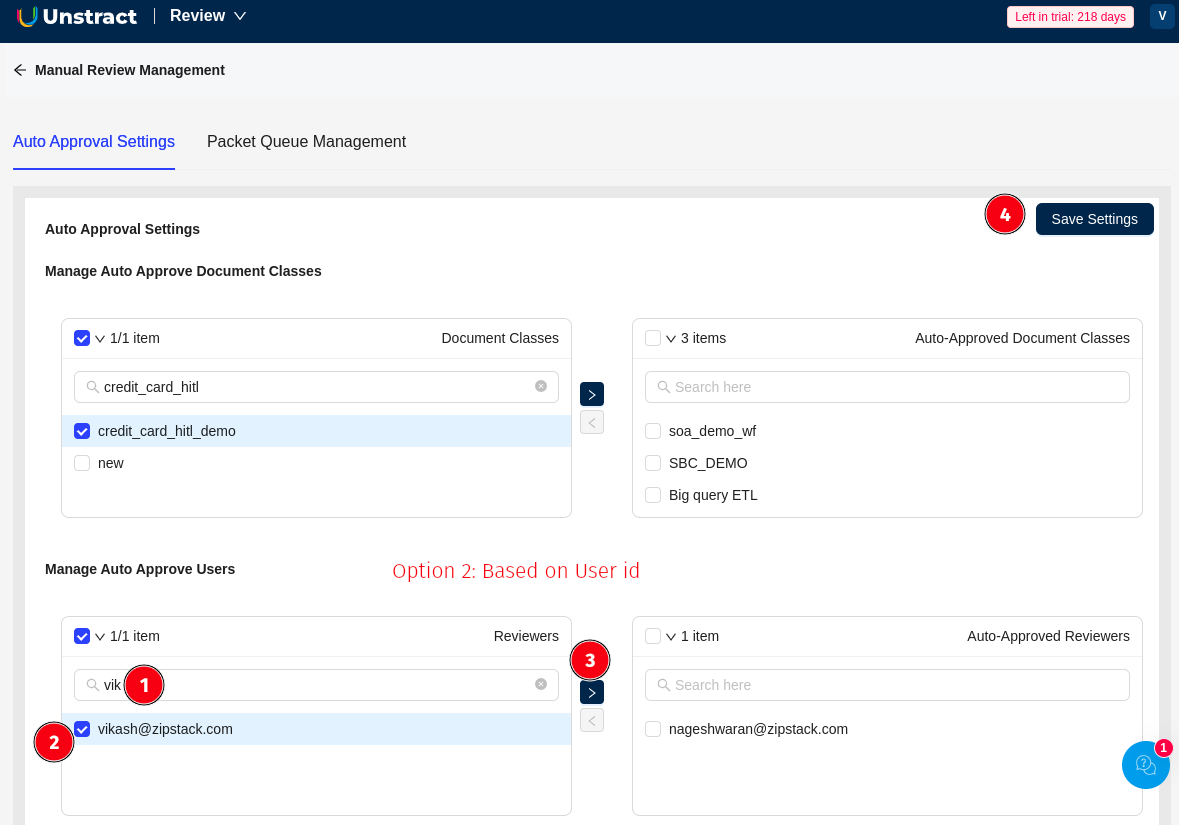
Option 2: Based on Users (Reviewers)
Configure auto-approval for specific reviewers:
-
Scroll down to the Manage Auto Approve Users section:
-
Search for the user in the search box (left panel labeled "Reviewers")
-
Select the user by checking the checkbox (e.g.,
vikash@zipstack.com) -
Click the arrow button (>) to move it to the right panel labeled "Auto-Approved Reviewers"
-
The selected user will now appear in the auto-approved reviewers list
Step 4: Save Settings
Click the Save Settings button in the top-right corner to apply your configuration.
How It Works
Once auto-approval is enabled:
- Reviewer validates the document in the Review screen
- Approval stage is automatically skipped
- Results are sent directly to:
- Output queue, OR
- Database
Important Notes
- Auto-approval can be configured based on document classes OR based on specific users, or both
- When configured by document class: All documents of that class will be auto-approved after review
- When configured by user: All documents reviewed by that specific user will be auto-approved
- Changes take effect immediately after saving settings
Ensure proper authorization and validation processes are in place before enabling auto-approval, as this removes the second level of validation from your workflow.
Use Cases
When to Use Auto-Approval
- High-confidence document classes with consistent accuracy
- Trusted reviewers with proven validation track record
- Time-sensitive workflows requiring faster processing
- Projects with simpler validation requirements
When NOT to Use Auto-Approval
- Critical documents requiring dual validation
- New document classes still being trained
- Compliance-heavy workflows requiring multiple sign-offs
- High-risk financial or legal documents