SharePoint Filesystem Connector
File system connectors like SharePoint enable Unstract to read files from SharePoint Online document libraries and OneDrive for Business. It supports Microsoft 365 work/school accounts from any organization.
Prerequisites
- A Microsoft 365 work/school account (Business Basic or higher) with a SharePoint Online or OneDrive for Business license assigned to the user.
- Personal Microsoft accounts (
@outlook.com,@hotmail.com) are not supported.
Adding SharePoint Connector in Unstract
For the common steps on adding connectors in Unstract, see Working with Connectors.
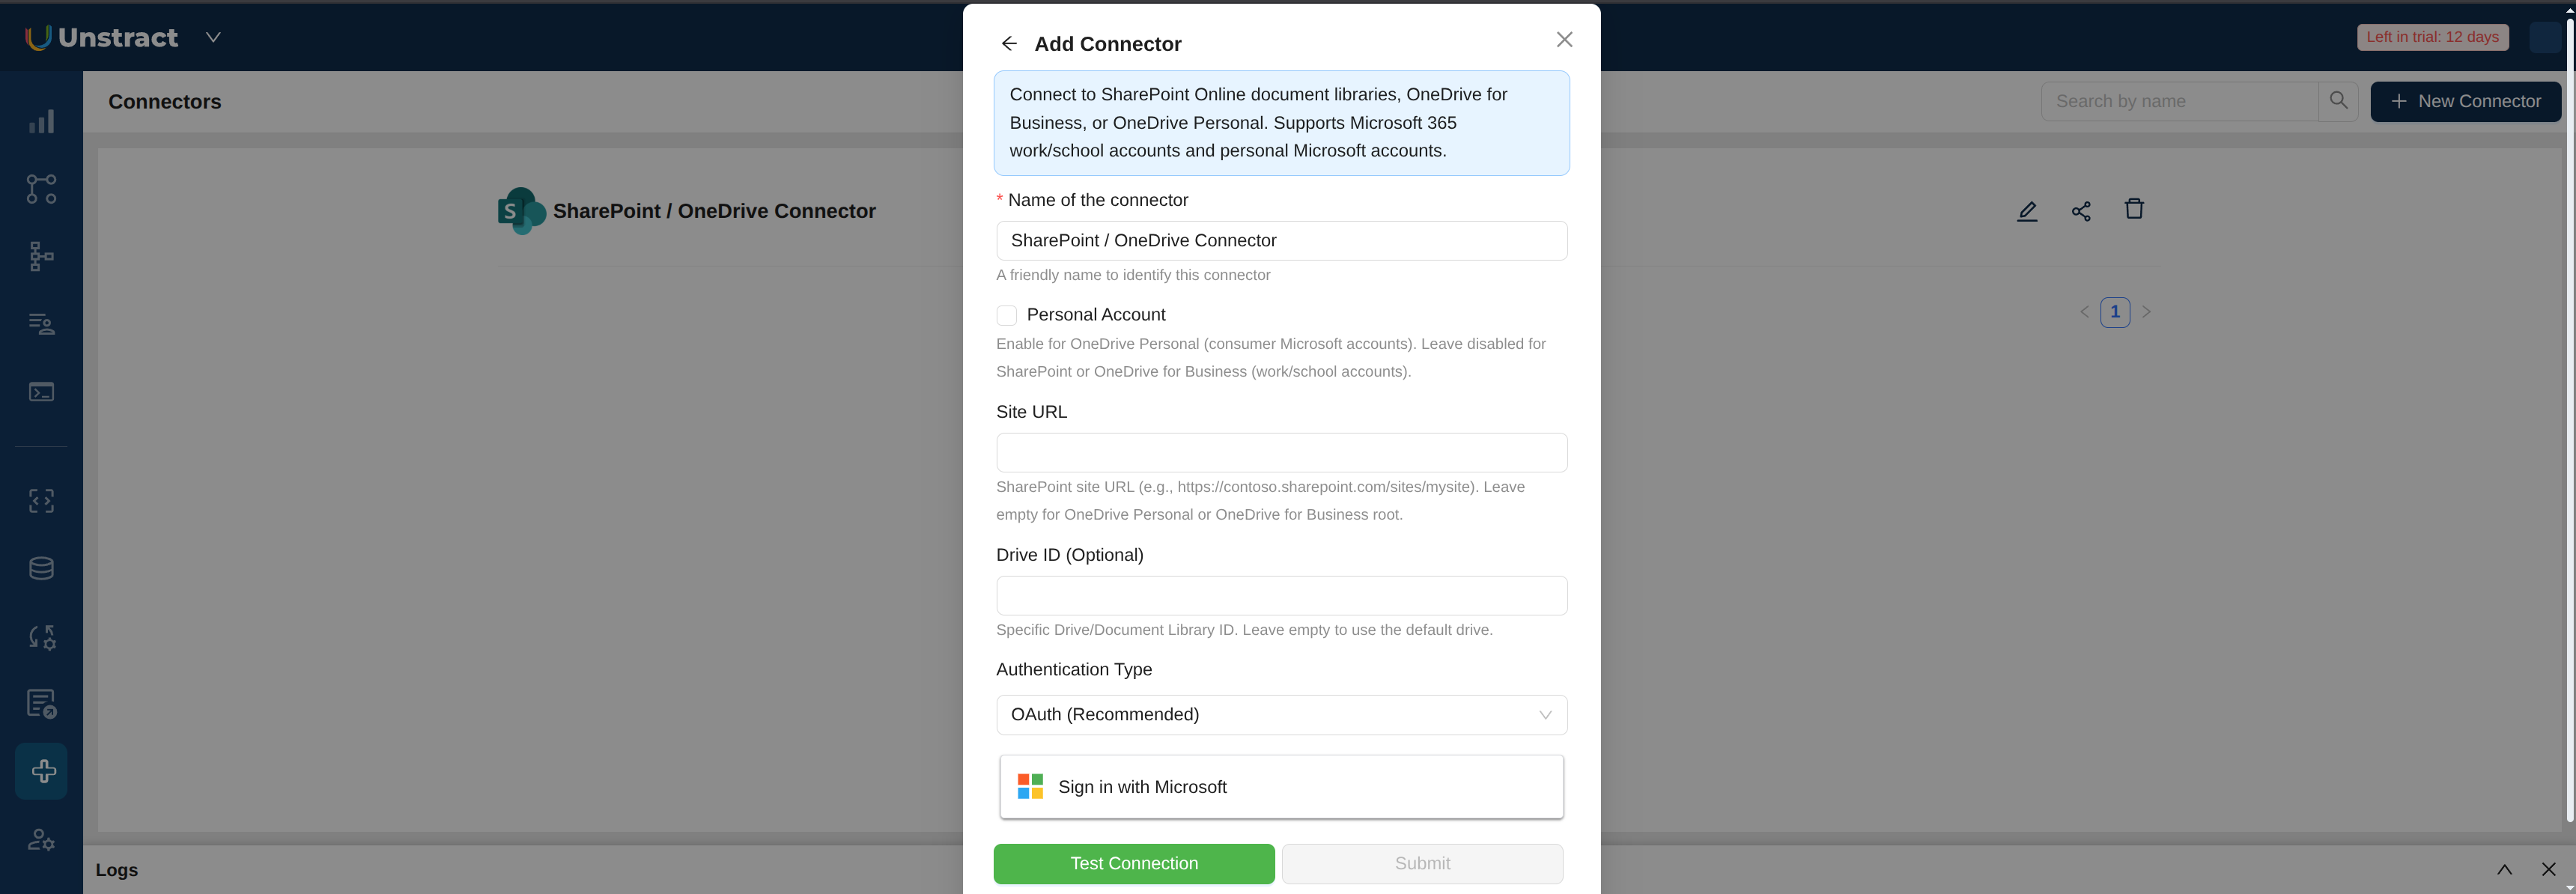
OAuth (Recommended)
With OAuth, you sign in with your existing Microsoft work/school account. No Azure AD app registration is needed on your side — the Unstract platform handles this.
- Select OAuth (Recommended) as the Authentication Type.
- Click Sign in with Microsoft and sign in with your work/school account.
- Grant consent when prompted ("Unstract wants to access your files").
- The button will switch to Authenticated.
Your organization's Azure AD admin may need to grant admin consent before you can sign in. If you see a "Need admin approval" screen, contact your IT admin.
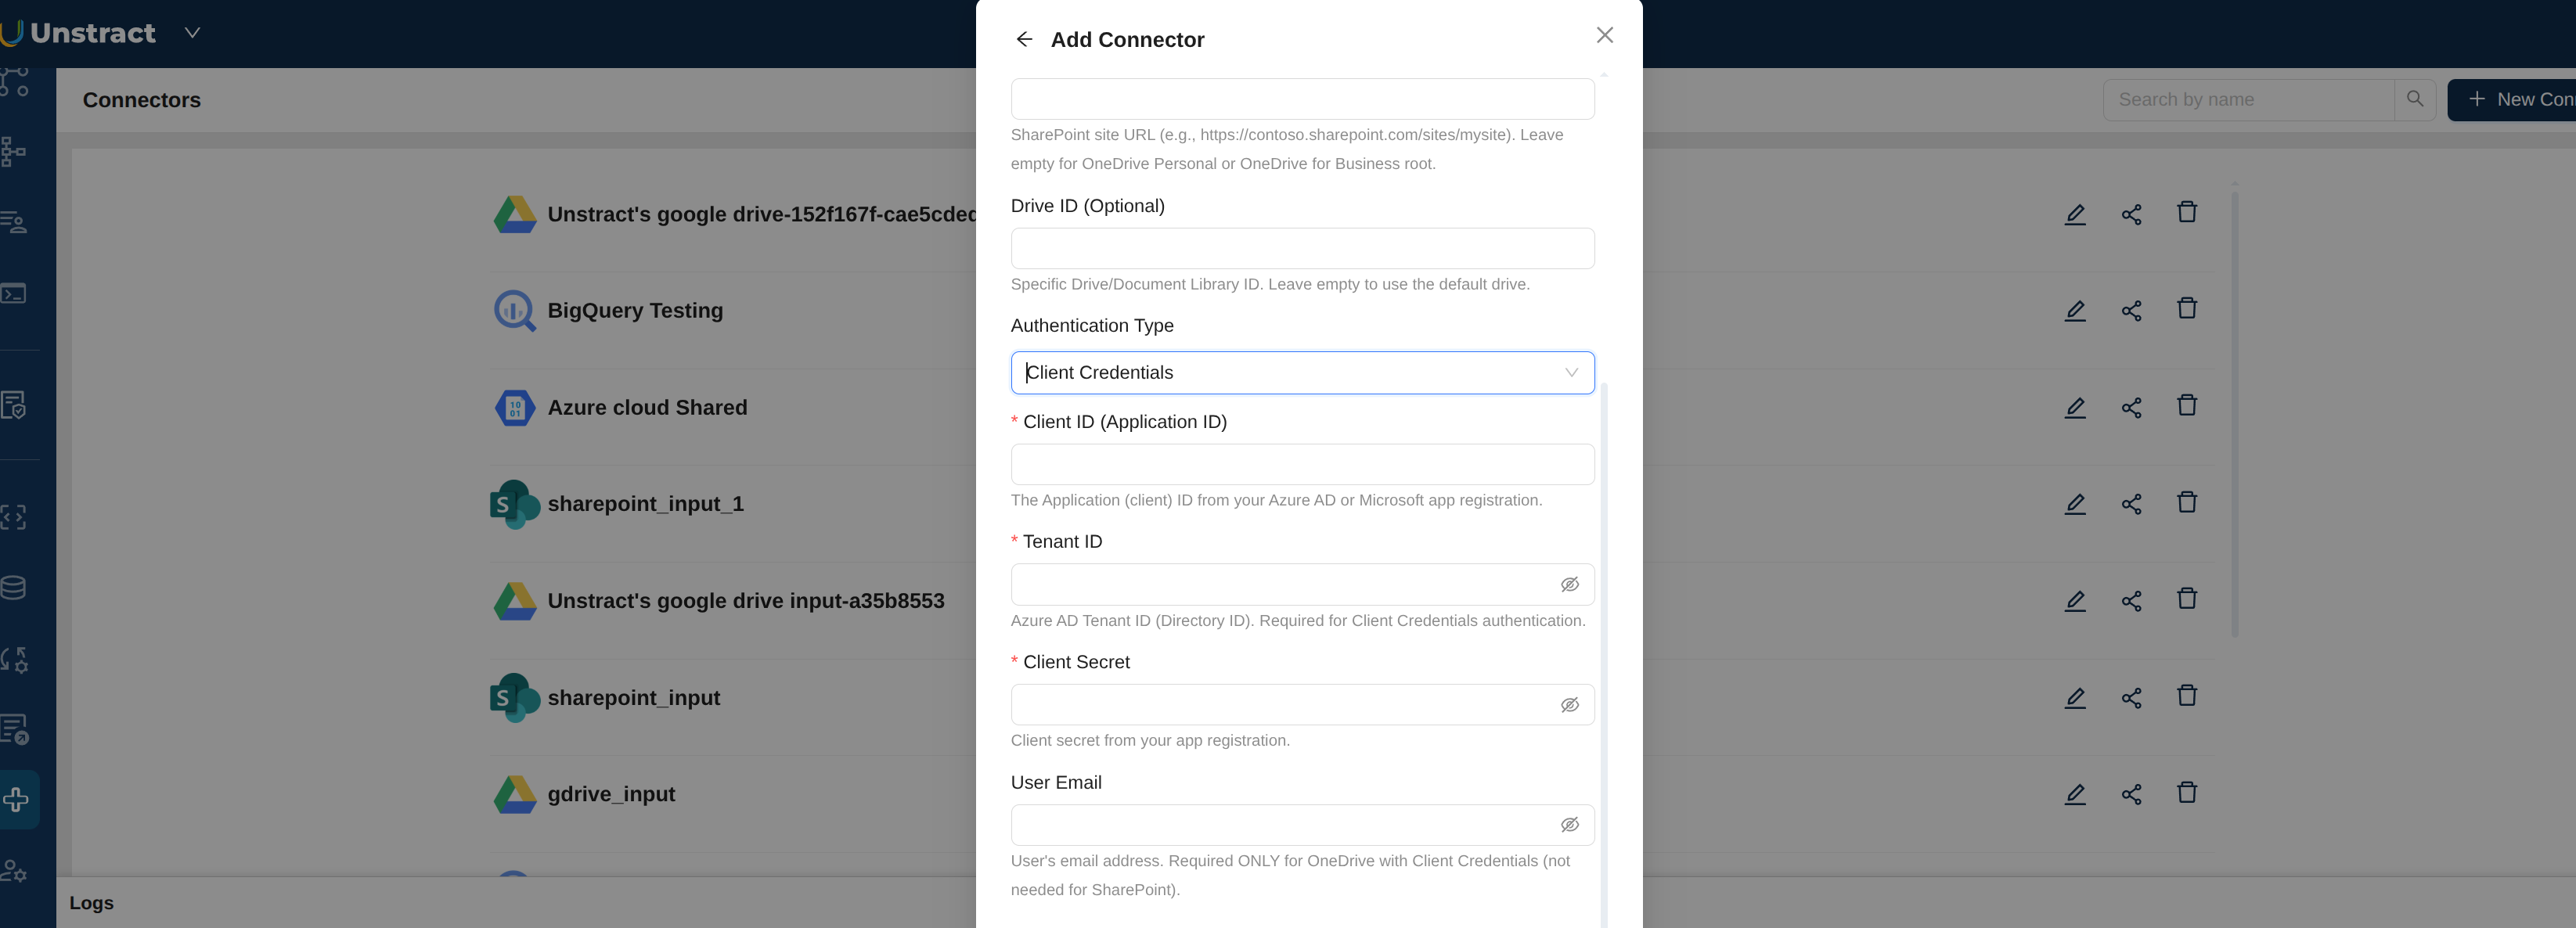
Client Credentials
With Client Credentials, you authenticate using an Azure AD app registration that you manage. This is useful for service accounts and automation scenarios where no user sign-in is involved.
You will need to set up an Azure AD app registration first, then provide:
- Client ID (Application ID): from your app registration
- Tenant ID: from your app registration
- Client Secret: from your app registration
- User Email: required only for OneDrive with Client Credentials (not needed for SharePoint)
Configuration Fields
- Name of the connector: A descriptive name to identify this connector.
- Site URL: SharePoint site URL (e.g.,
https://contoso.sharepoint.com/sites/mysite). Leave empty for OneDrive for Business root. - Drive ID (Optional): Specific Drive or Document Library ID. Leave empty to use the default drive.
- Authentication Type: Select OAuth (Recommended) or Client Credentials.
Azure AD App Setup for Client Credentials
This section is only needed if you are using Client Credentials authentication. If you are using OAuth, skip this section entirely.
1. Sign in to the Microsoft Entra admin center
- Go to the Microsoft Entra admin center.
- Sign in with an account that can create app registrations in your tenant.
2. Open your app registration
- In the left navigation, go to Entra ID → App registrations.
- Either create a new registration (+ New registration) or open the existing app you want Unstract to use.
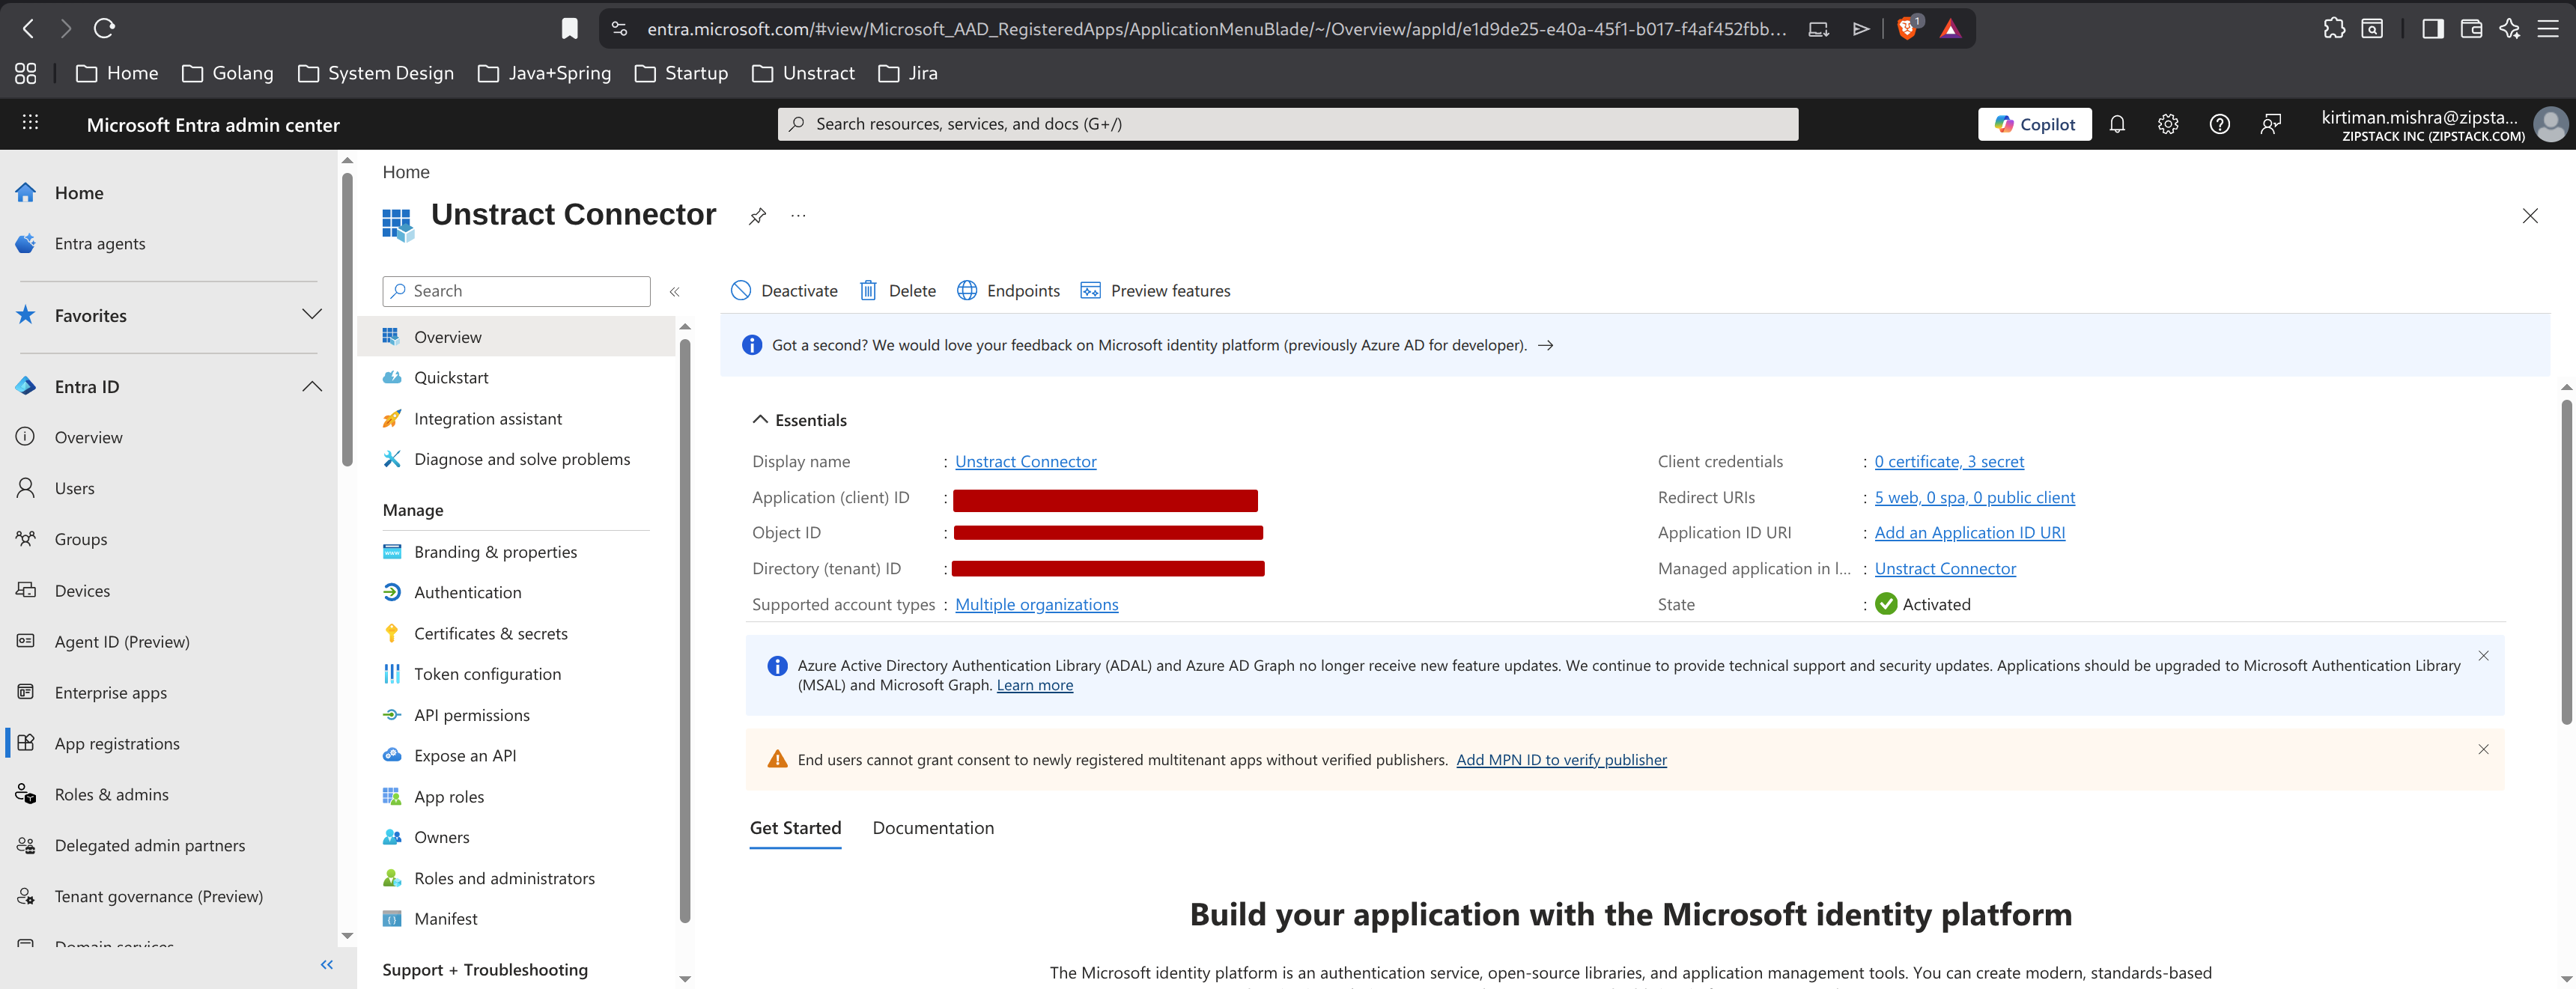
3. Copy the Application (client) ID and Directory (tenant) ID
On the app's Overview page, copy the following values from the Essentials panel:
- Application (client) ID
- Directory (tenant) ID
4. Create a client secret
- Click Certificates & secrets in the left navigation.
- On the Client secrets tab, click + New client secret.
- Provide a description and expiry, then click Add.
- Copy the new secret's Value immediately — Azure masks it once you navigate away. If lost, delete it and create a new one.

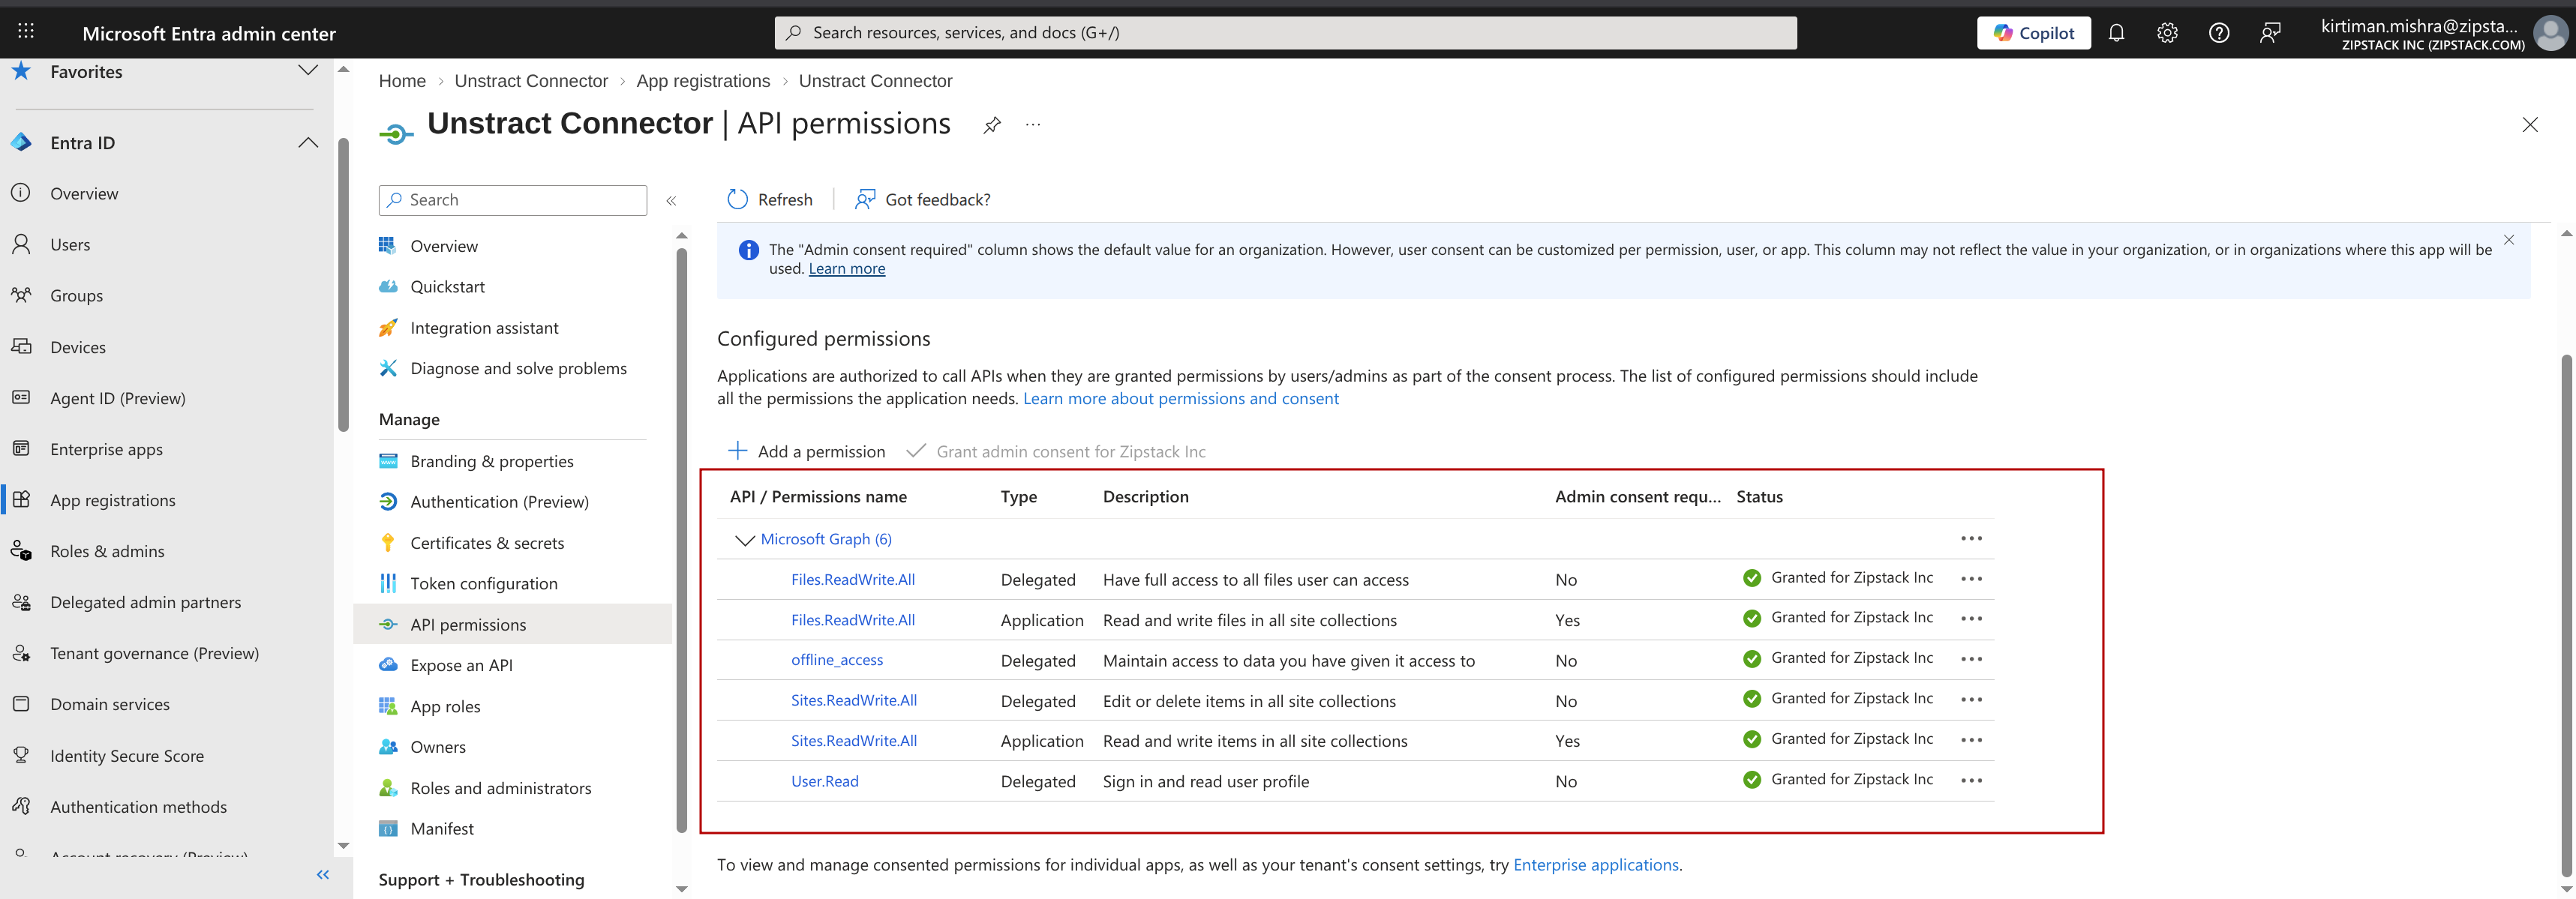
5. Add Microsoft Graph API permissions
- Click API permissions → + Add a permission → Microsoft Graph → Application permissions.
- Add:
Files.ReadWrite.All,Sites.ReadWrite.All - Click Grant admin consent for
<tenant>. All rows should then show a green check in the Status column.