Set Up ETL Pipeline
This guide shows you how to create and configure an ETL Pipeline in Unstract.
Prerequisites
- Export a Prompt Studio project as a tool
- Configure your source filesystem connector
- Configure your destination database connector
Creating the ETL Pipeline
Option 1: From Workflow (Recommended)
- Navigate to Workflows in the side navigation
- Create a new workflow following the Workflow Setup Guide
- Configure your workflow:
- Source: Select your filesystem connector
- See Source Configuration for detailed settings
- Destination: Select your database connector
- See Destination Configuration for database settings
- Tool: Select your exported Prompt Studio project
- Source: Select your filesystem connector
- Click Deploy as ETL
Option 2: Direct ETL Creation
- Navigate to ETL Pipelines in the side navigation
- Click New ETL Pipeline
- Select an existing workflow or create a new one
- Configure ETL-specific settings (see below)
ETL-Specific Configuration
Scheduling
Set up automated execution with cron scheduling:
- For Display Name, enter a descriptive name for your ETL pipeline
- In Cron Schedule, specify when the ETL should trigger (in UTC time)
- Example:
0 2 * * *(runs daily at 2:00 AM UTC)
- Example:
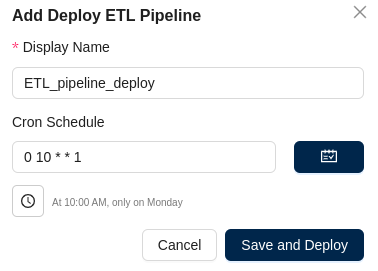
Deployment Confirmation
Once deployed, the ETL will automatically trigger at the configured time.
Managing Your ETL Pipeline
Manual Execution
Trigger your ETL pipeline on demand:
- ETL Pipeline → Actions → Manual Sync
Monitoring Execution
View execution logs and status:
- ETL Pipeline → Actions → View Logs
Or navigate to: MANAGE → Logs → ETL Sessions
File Processing Behaviour
Once a file is processed in an ETL pipeline, it is tracked to avoid reprocessing. See File History for details on viewing and managing processed files.
- View File History: ETL Pipeline → Actions → View File History
- Clear All History: ETL Pipeline → Actions → Clear Processed File History
Notifications
Set up alerts for your ETL pipeline:
ETL Pipeline → Actions → Setup Notifications